

- Platform
- Magento 2 CE & EE
- Versions
- 2.3.x - 2.4.x
- Extension
- Magento Marketplace
- Last Updated
- March 10, 2022
This guide will take you step by step through how to integrate TaxJar into your Magento 2 account. You’ll learn how to configure Magento 2 to automate sales tax calculations as well as what you need to do when it comes time to file.
Sales tax is complex, with regulations changing constantly. For a primer on the basics of sales tax, including nexus, registration, filing, reporting, calculations and more, please visit Sales Tax Fundamentals. Also, be sure to take a look at our Resource Center, with articles, webinars and videos for beginners and experts alike.
Please note that TaxJar for Magento 2 requires a TaxJar Professional subscription.
How to Connect Your Magento 2 Store
Magento Marketplace no longer supports direct package download. Instead, you should install our module with Composer using the following command:
composer require taxjar/module-taxjar
Alternatively, you can access all of the code on GitHub and download the extension as a ZIP file by clicking Download ZIP.
If you’re installing the extension manually, unzip the archive and upload the files to /app/code/Taxjar/SalesTax. After uploading, run the following Magento CLI commands:
bin/magento module:enable Taxjar_SalesTax
bin/magento setup:upgrade
bin/magento setup:di:compile
These commands will enable the TaxJar extension, perform necessary database updates, and re-compile your Magento store. If you decide to manually update the TaxJar extension later, run setup:upgrade and setup:di:compile again after installing the update.
Transitioning from Magento 1 to Magento 2
Already using TaxJar for Magento 1? Both of our extensions handle sales tax calculations similarly, but if you’ve been using TaxJar for sales tax reporting and filing you’ll need to make a quick change. Log in to your TaxJar account and go to Account > Linked Accounts. Click Unlink to remove your existing Magento 1 connection. In Magento 2, transactions are imported directly through our extension using the TaxJar API. We’ll set up transaction sync shortly.
Pre-Import Checklist
Before going further, let’s review some of your existing Magento settings to make sure TaxJar is clear for landing. Log in to your Magento admin panel.
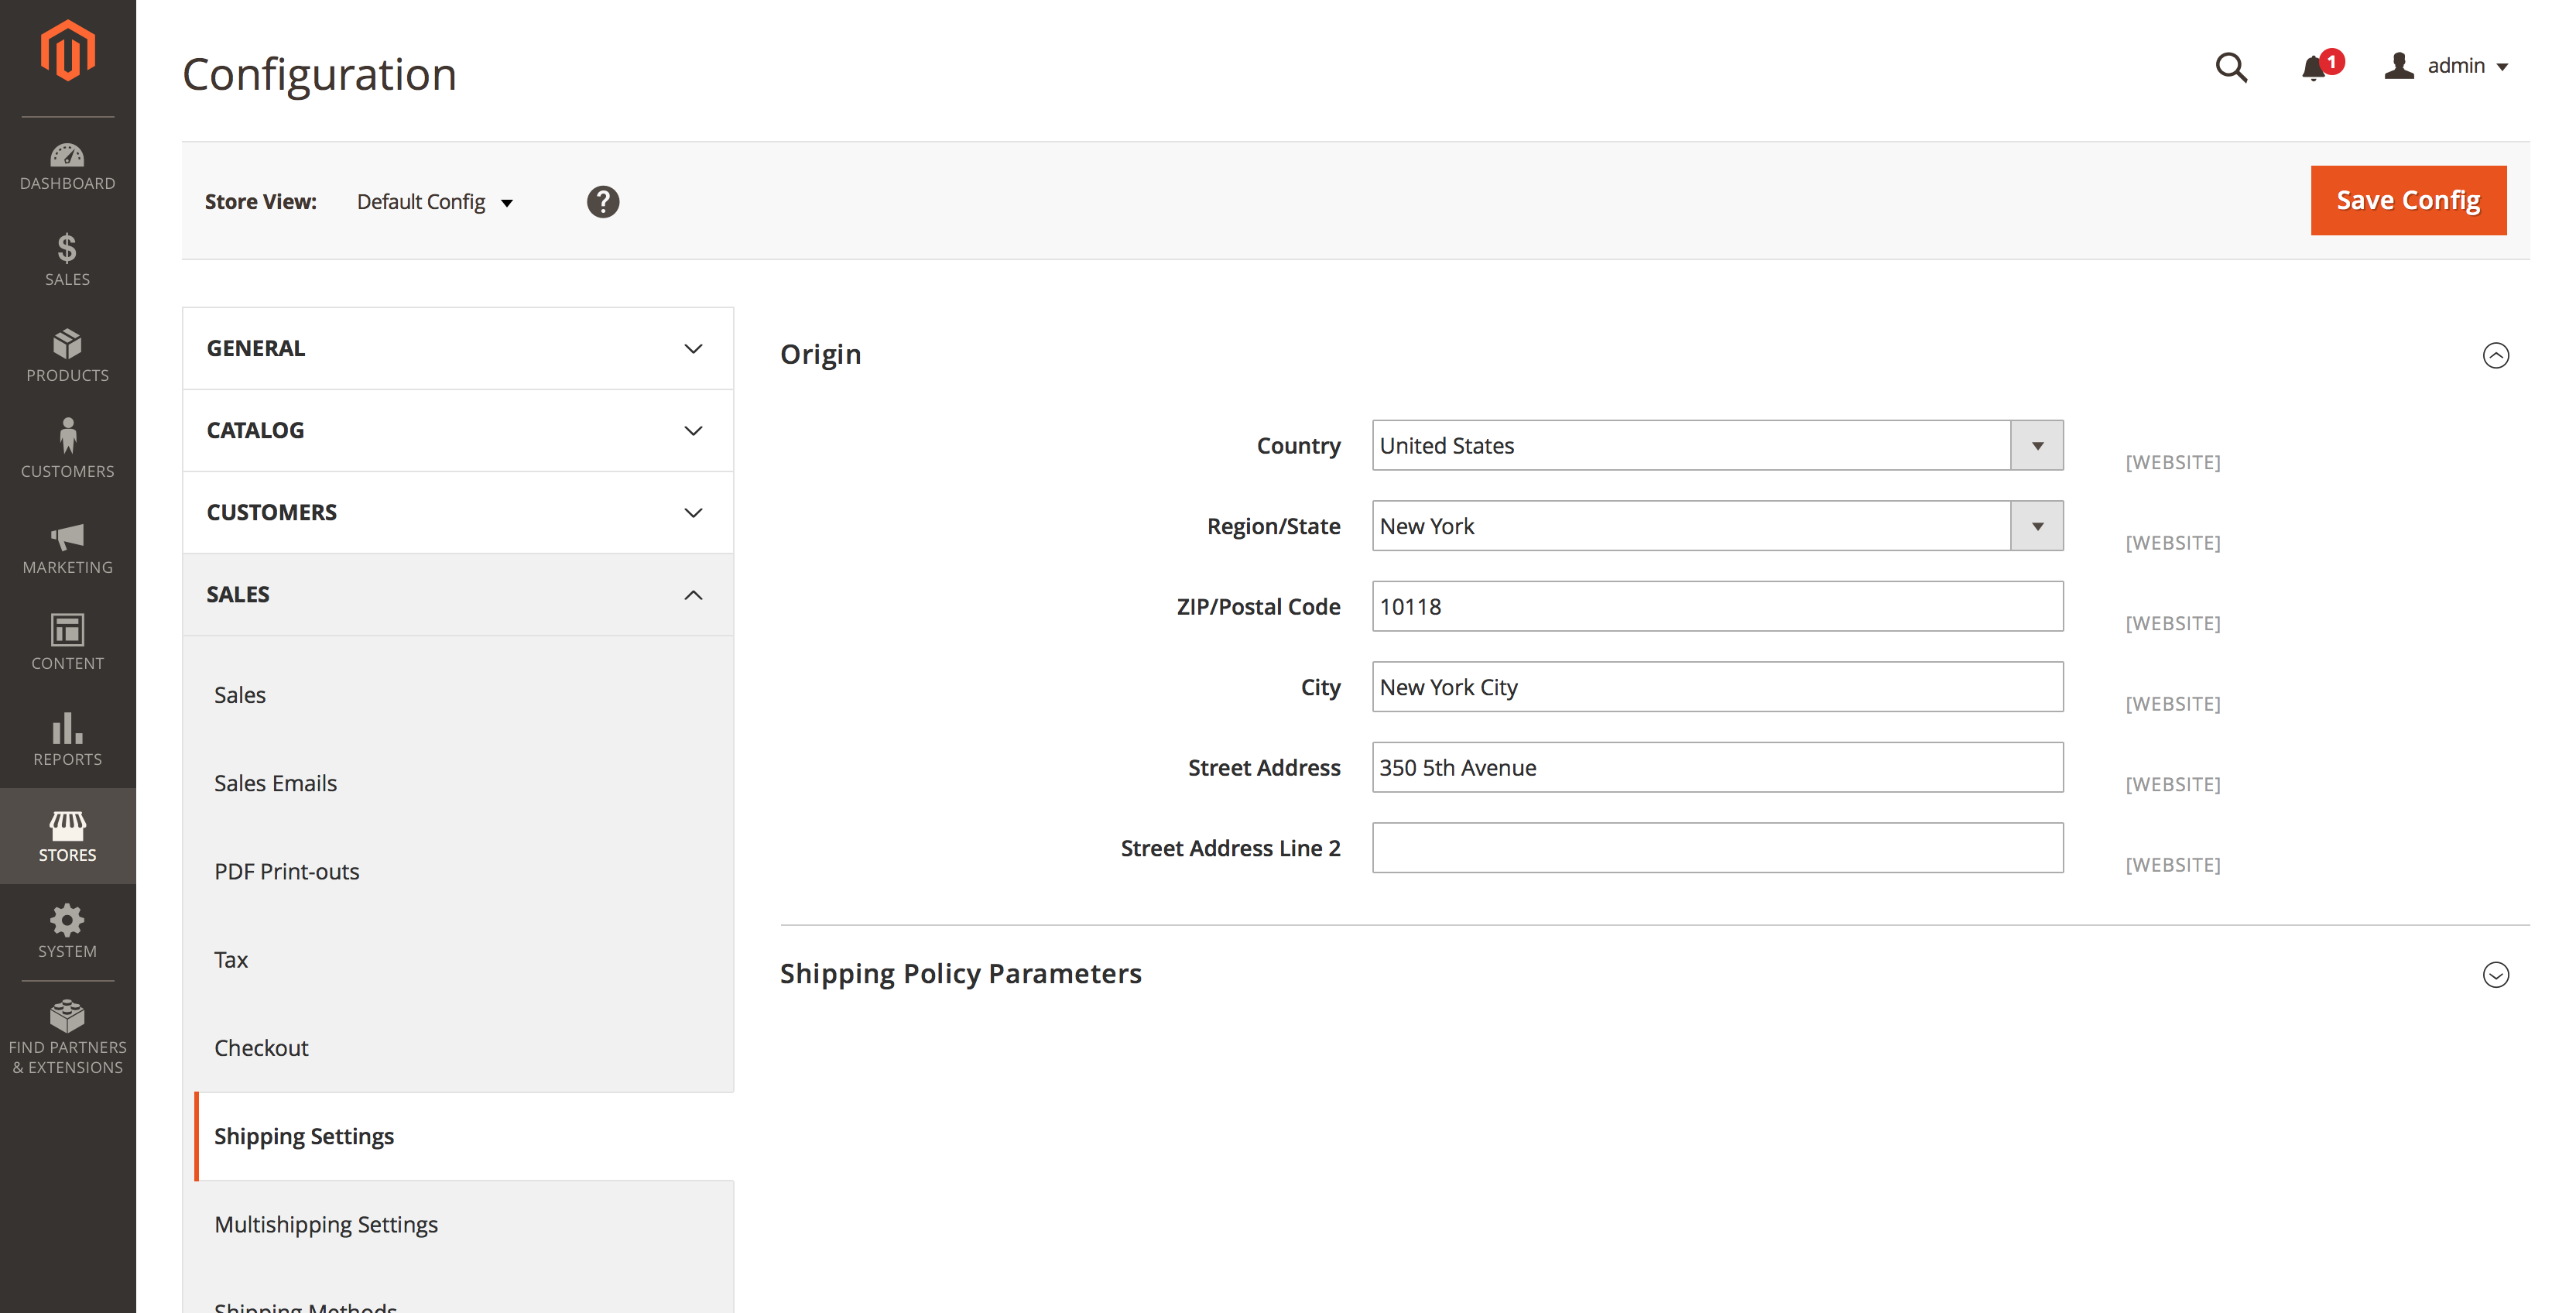
Shipping Origin
Go to Stores > Configuration in your admin panel. Under Sales > Shipping Settings > Origin, make sure you have a valid address with a US-based region and 5-digit postal code. If not, go ahead and add your address then click the orange Save Config button.
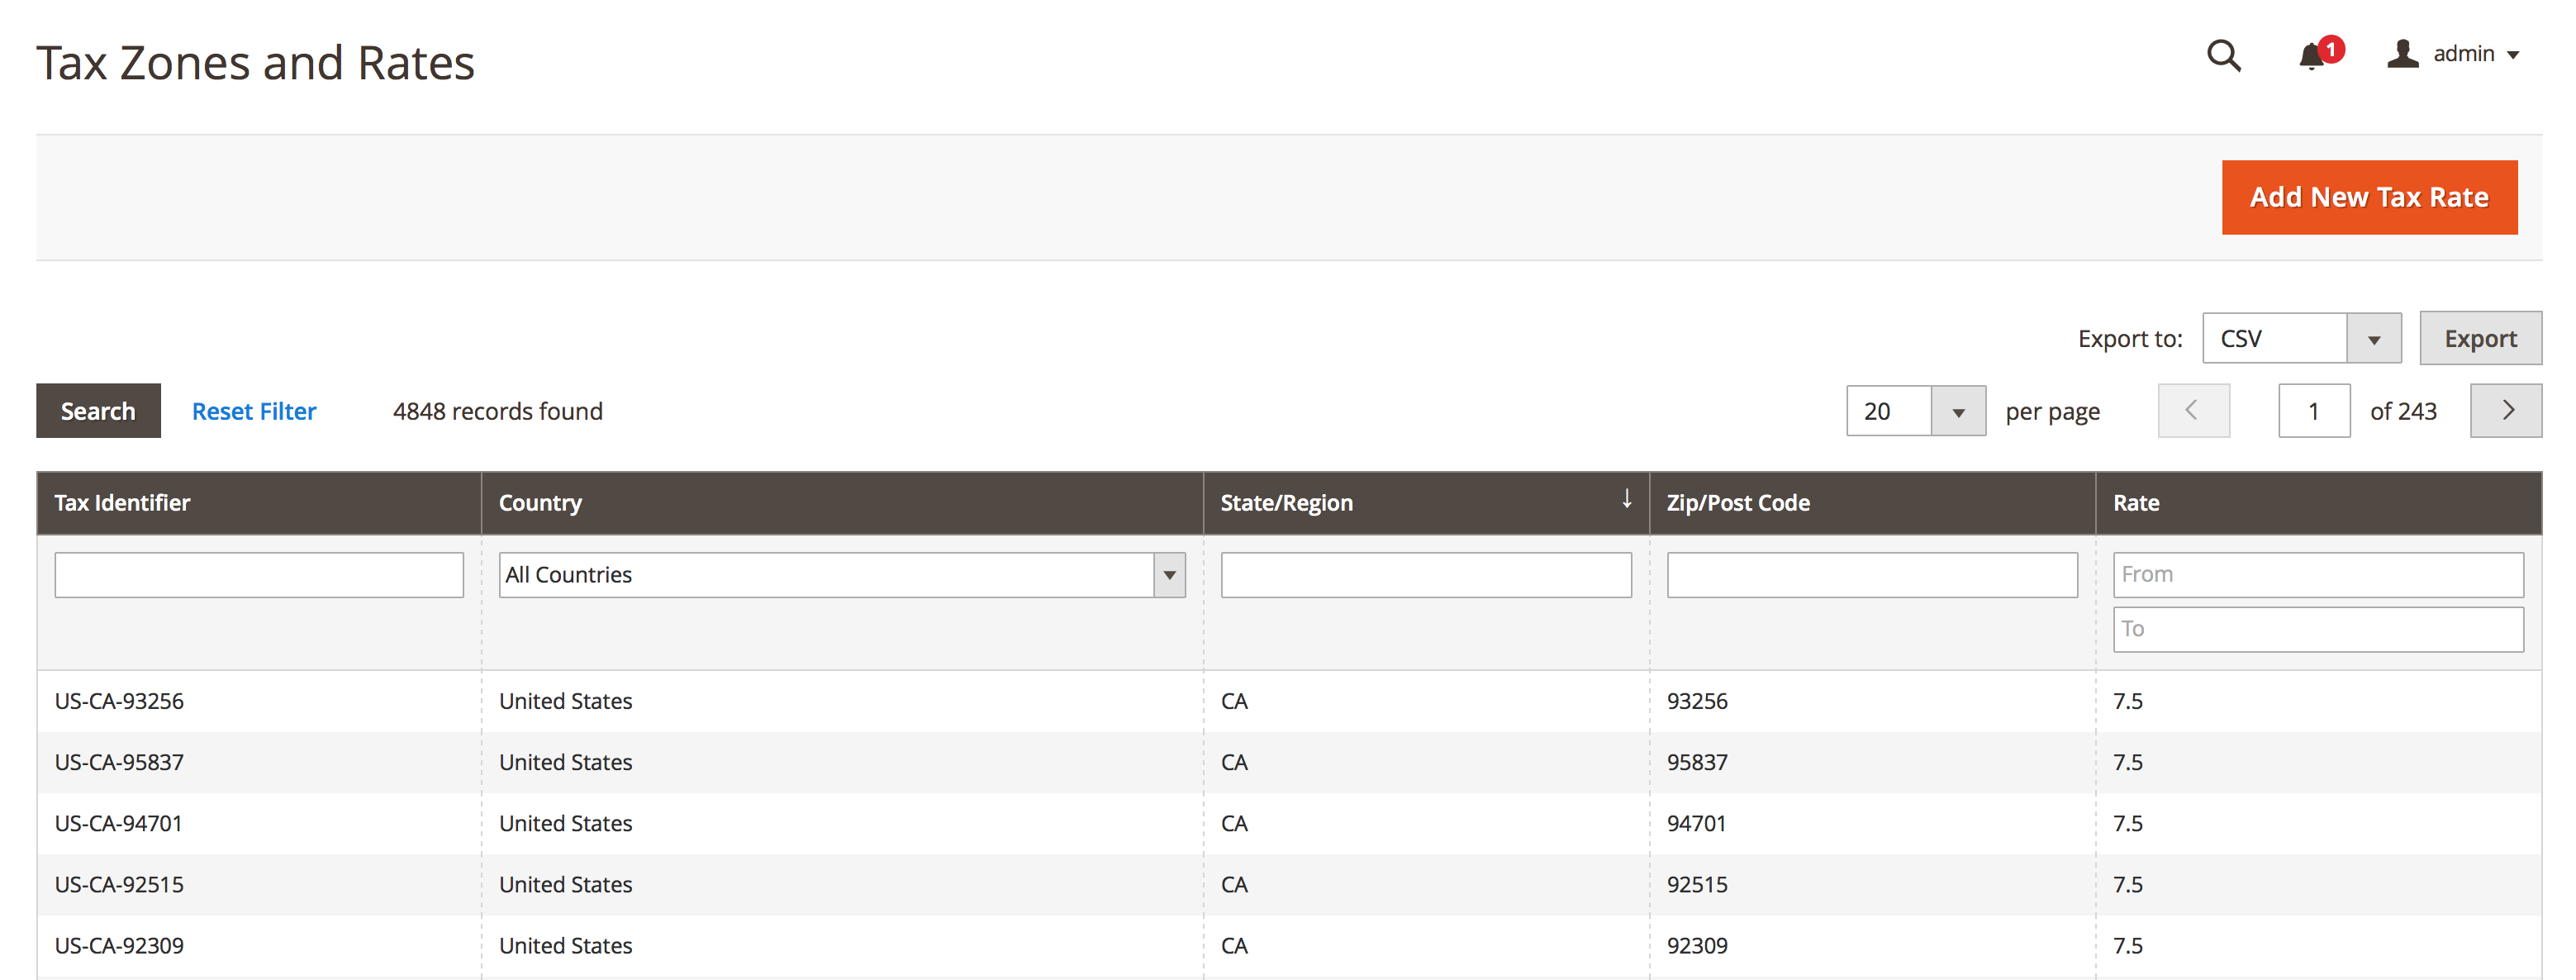
Sales Tax Rates
If you have existing sales tax rates, don’t worry. We only overwrite zip-based sales tax rates if they reside in one of your nexus states. Your other rates will be remain intact and can still be used.
To review your existing rates, go to Stores > Tax Zones & Rates.
Sales Tax Rules
For existing sales tax rules don’t sweat it either. We attach our zip-based sales tax rates to new or existing rules based on the tax classes you select in our extension. This means that custom rates can still be tied to existing sales tax rules. We’ve designed our extension to stay out of the way as much as possible.
Sales Tax Calculations
You’ve reviewed the pre-import checklist and everything looks ready for primetime.
Go to Stores > Configuration from the main menu. Select Tax under the Sales configuration menu on the left. We’re now ready to configure the TaxJar Magento 2 extension for sales tax calculations.
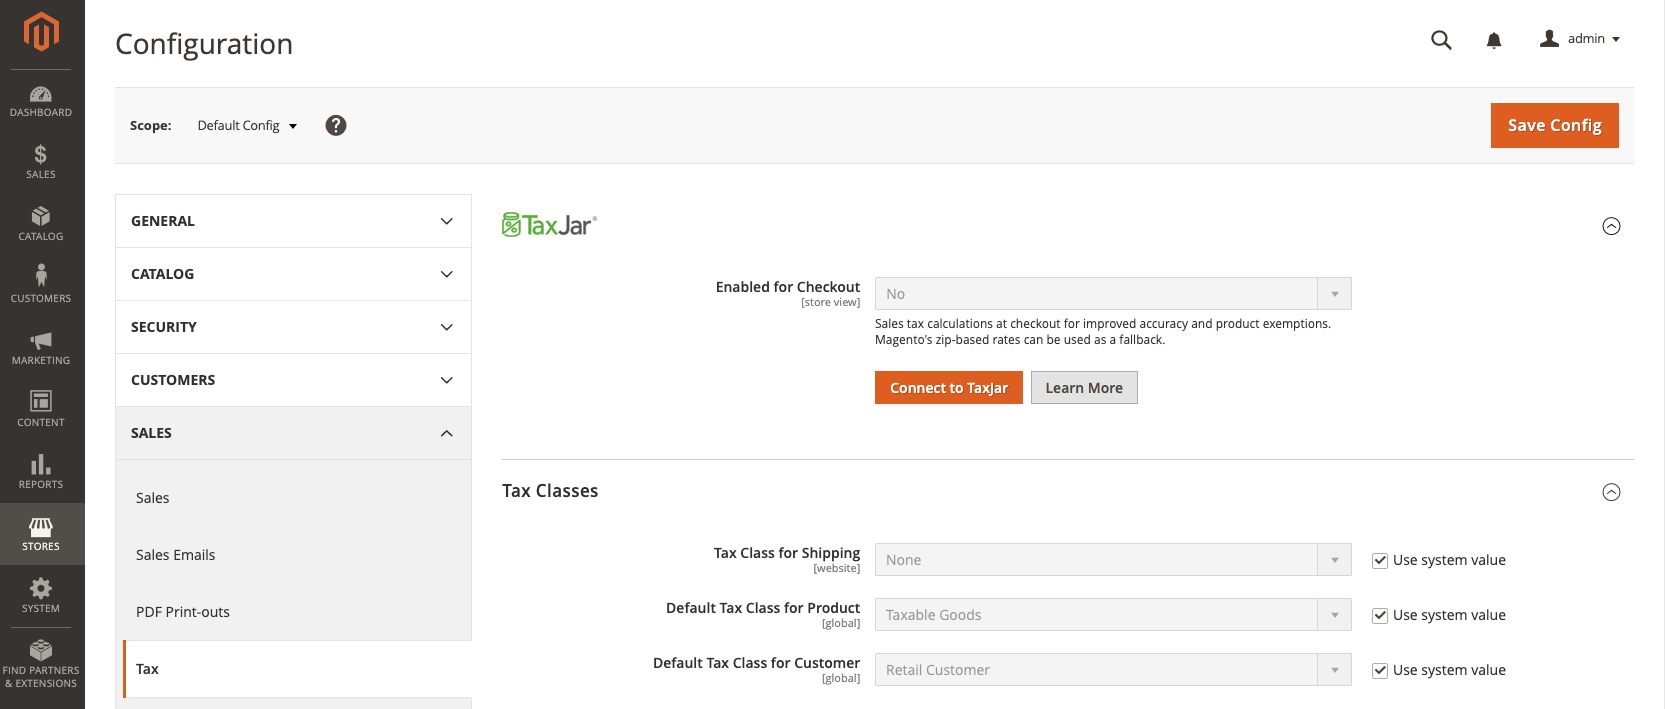
Connecting to TaxJar
Before enabling the TaxJar API, you’ll first need to connect to TaxJar from your Magento store. Click the Connect to TaxJar button. This will open a popup asking you to create a new account or log in to TaxJar. Once you’re in, you’ll be shown a confirmation screen to import your API token:
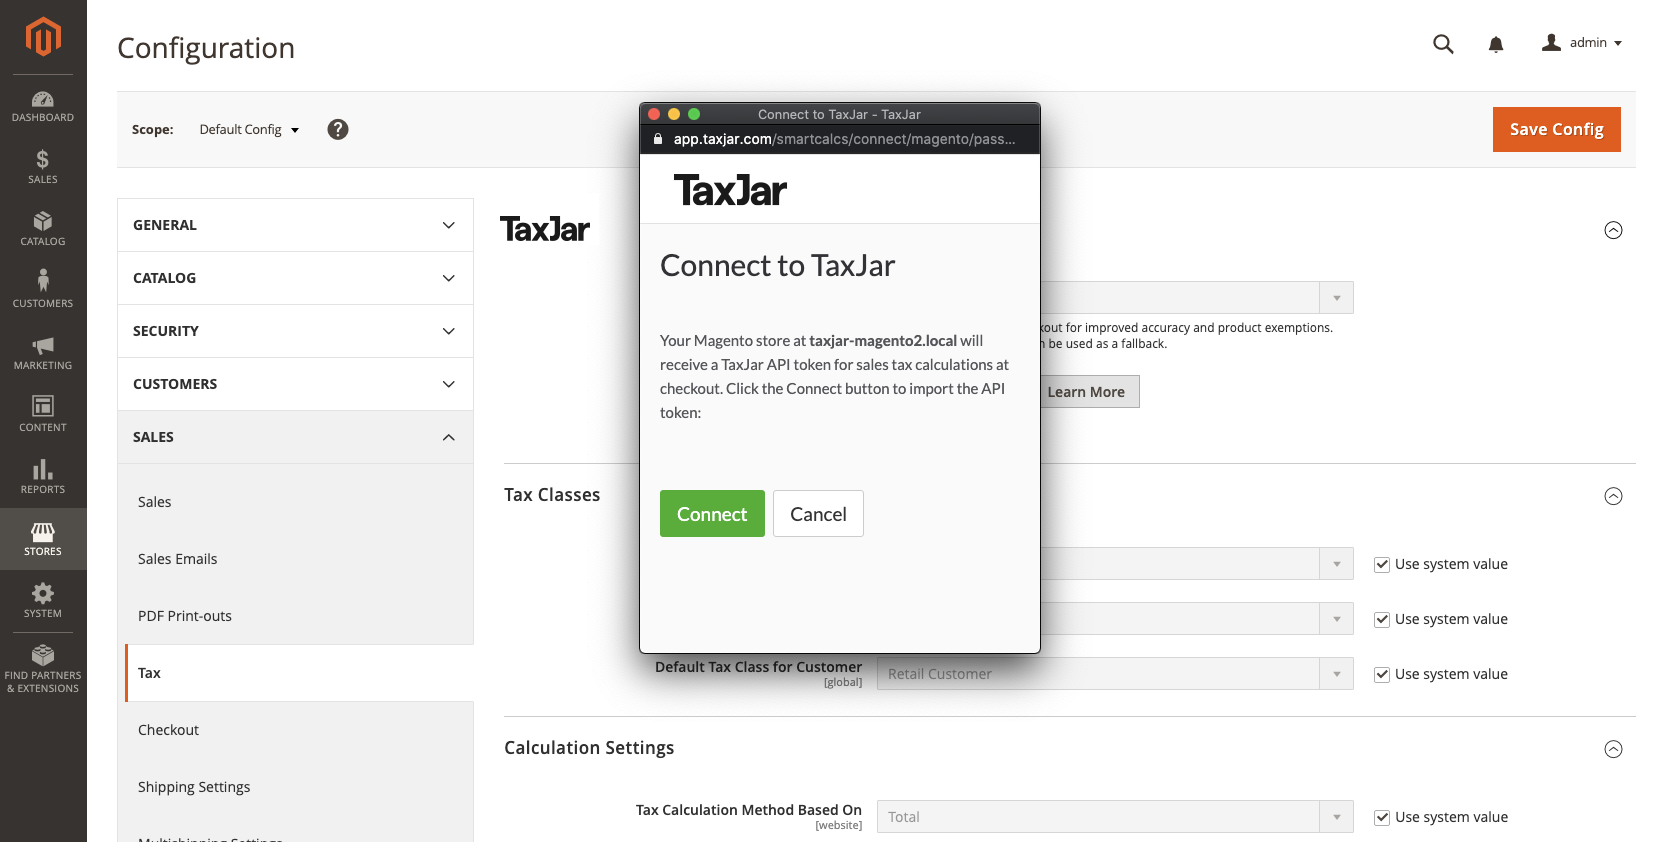
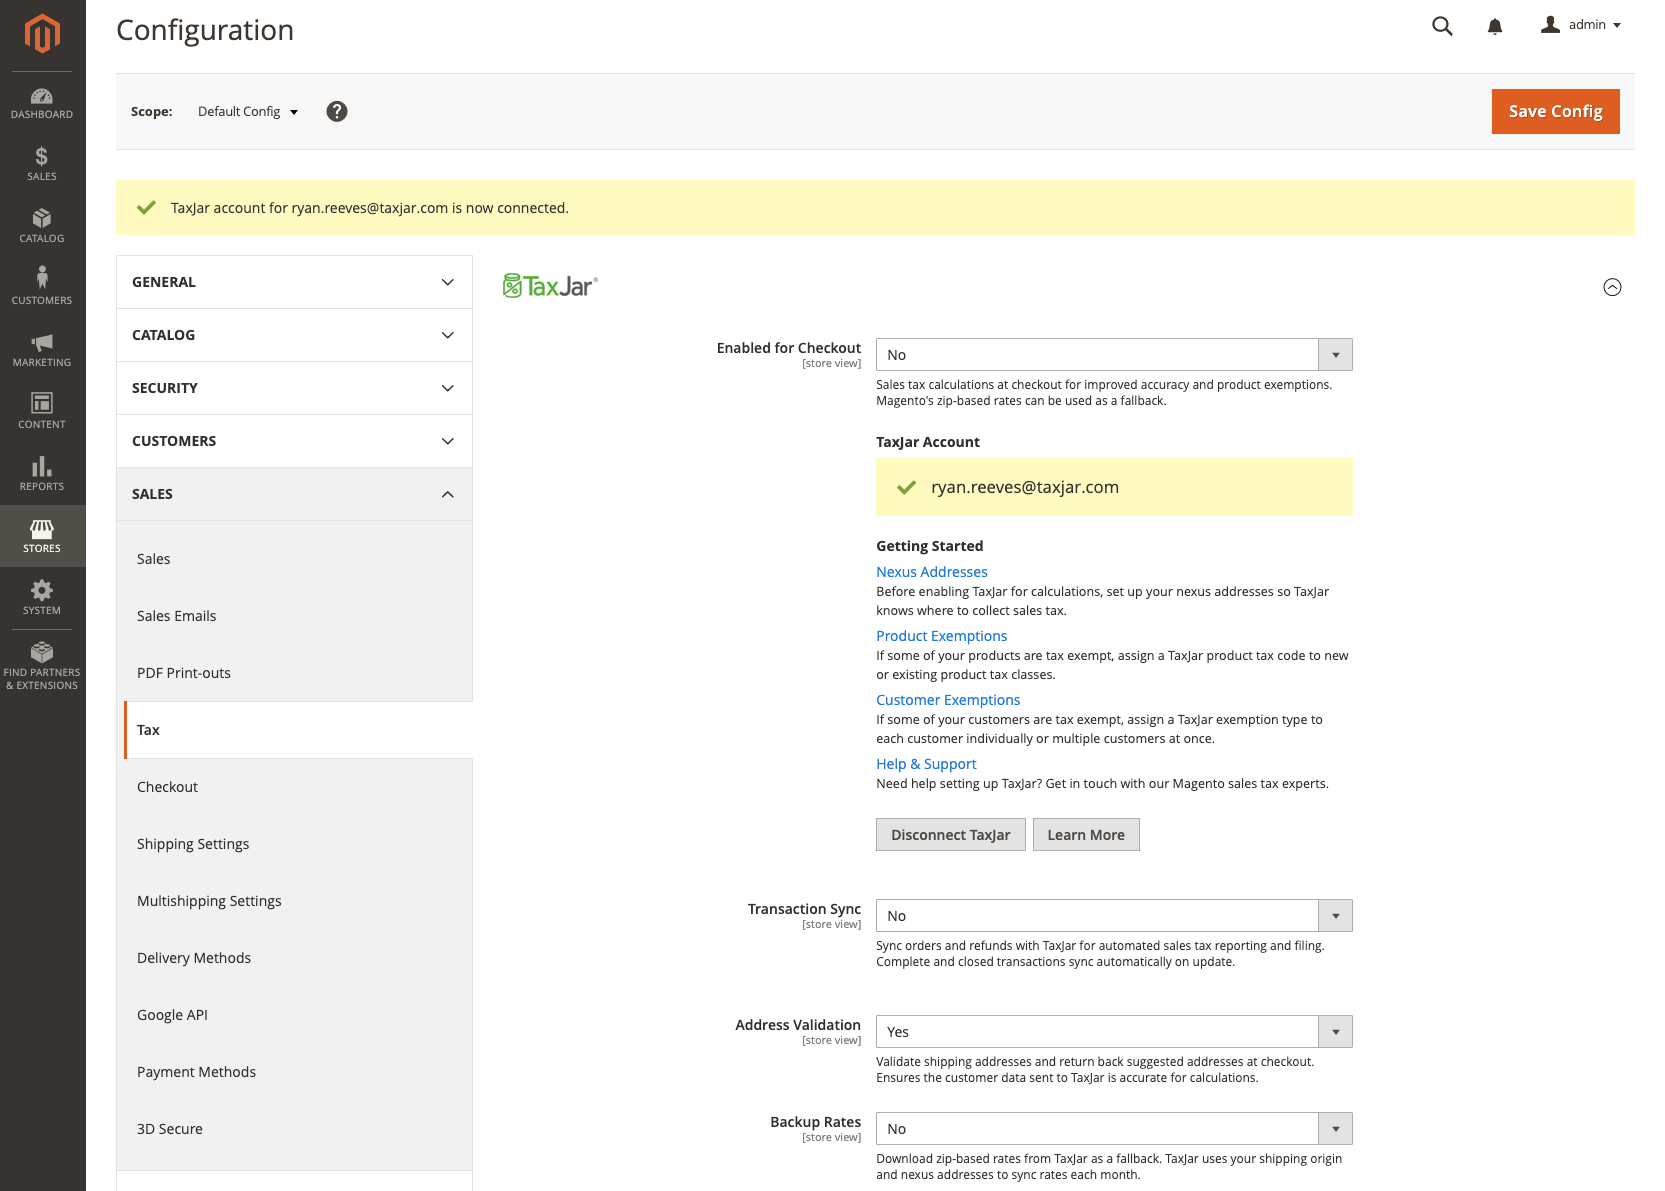
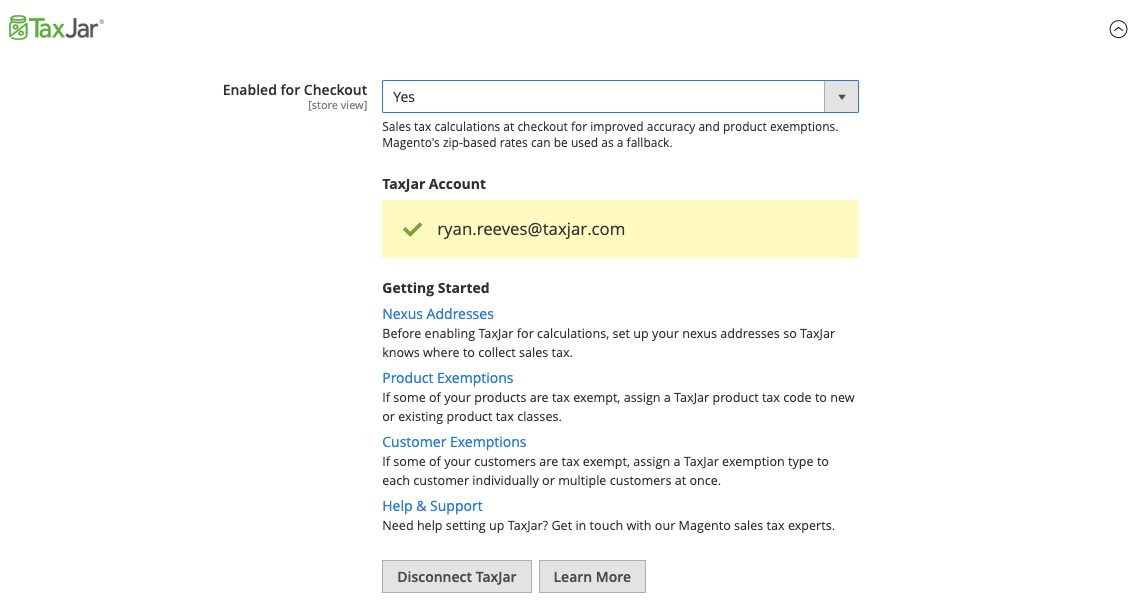
Click the Connect button and your token will automatically be saved in Magento. The configuration screen will refresh and show new options:
Nexus Addresses
After connecting to TaxJar, you’ll first want to set up the states where your company has nexus. Go to Stores > Nexus Addresses from the main menu. From there you can add, change, or delete nexus addresses associated with your TaxJar account. There’s also a Sync from TaxJar button to automatically import any of your existing addresses from TaxJar:
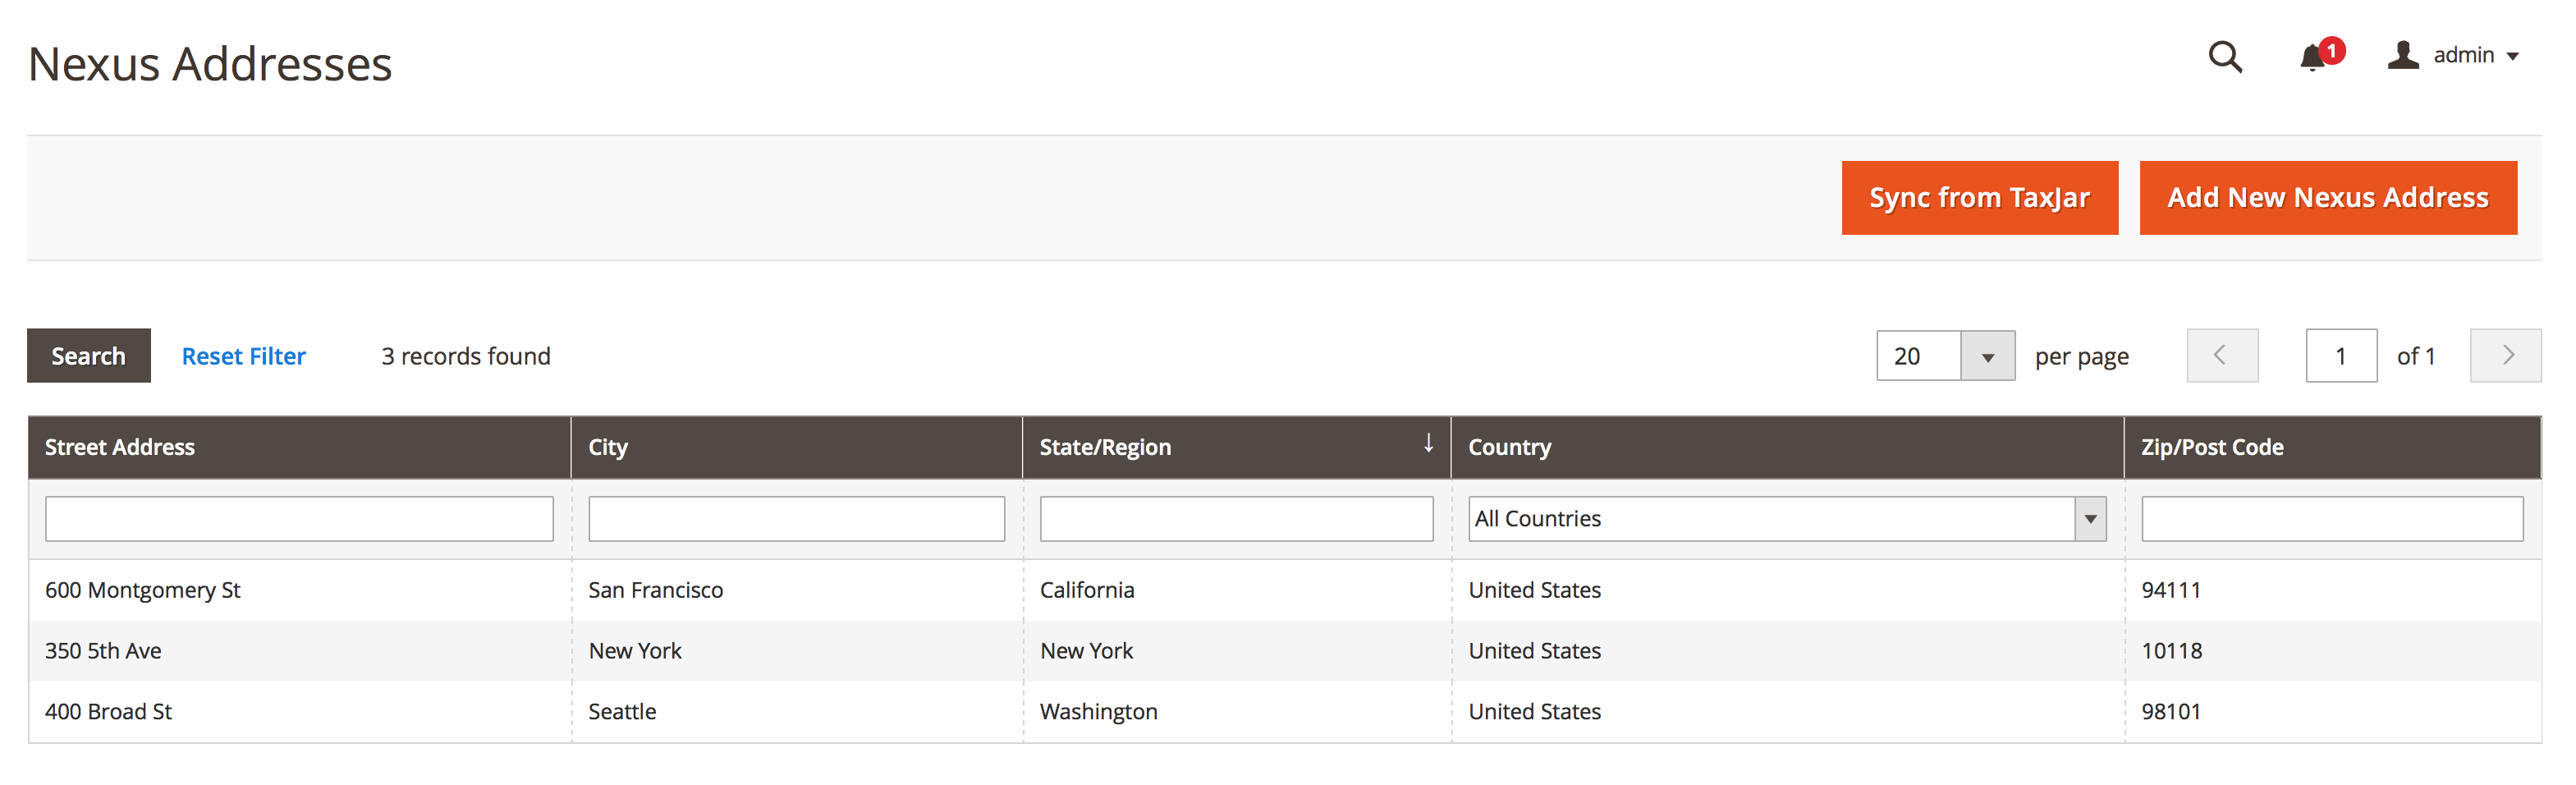
We currently support one address per state/region in the US. Make sure you enter a valid address for each state. If you’re unsure where you need to collect sales tax, read our blog post on nexus. We also provide helpful sales tax guides for each state.
Once you’re finished adding all of the states where you have nexus, continue on.
Product Sales Tax Exemptions
Before enabling the TaxJar API, you may want to assign a TaxJar product tax code to a product tax class in Magento. For example, say you have nexus in New York and sell clothing apparel. Clothing items under $110 are exempt in certain jurisdictions of New York. To set this up in Magento, all we need to do is go to Stores > Product Tax Classes. Click the Taxable Goods class and you’ll notice a shiny new dropdown for assigning a TaxJar product category:
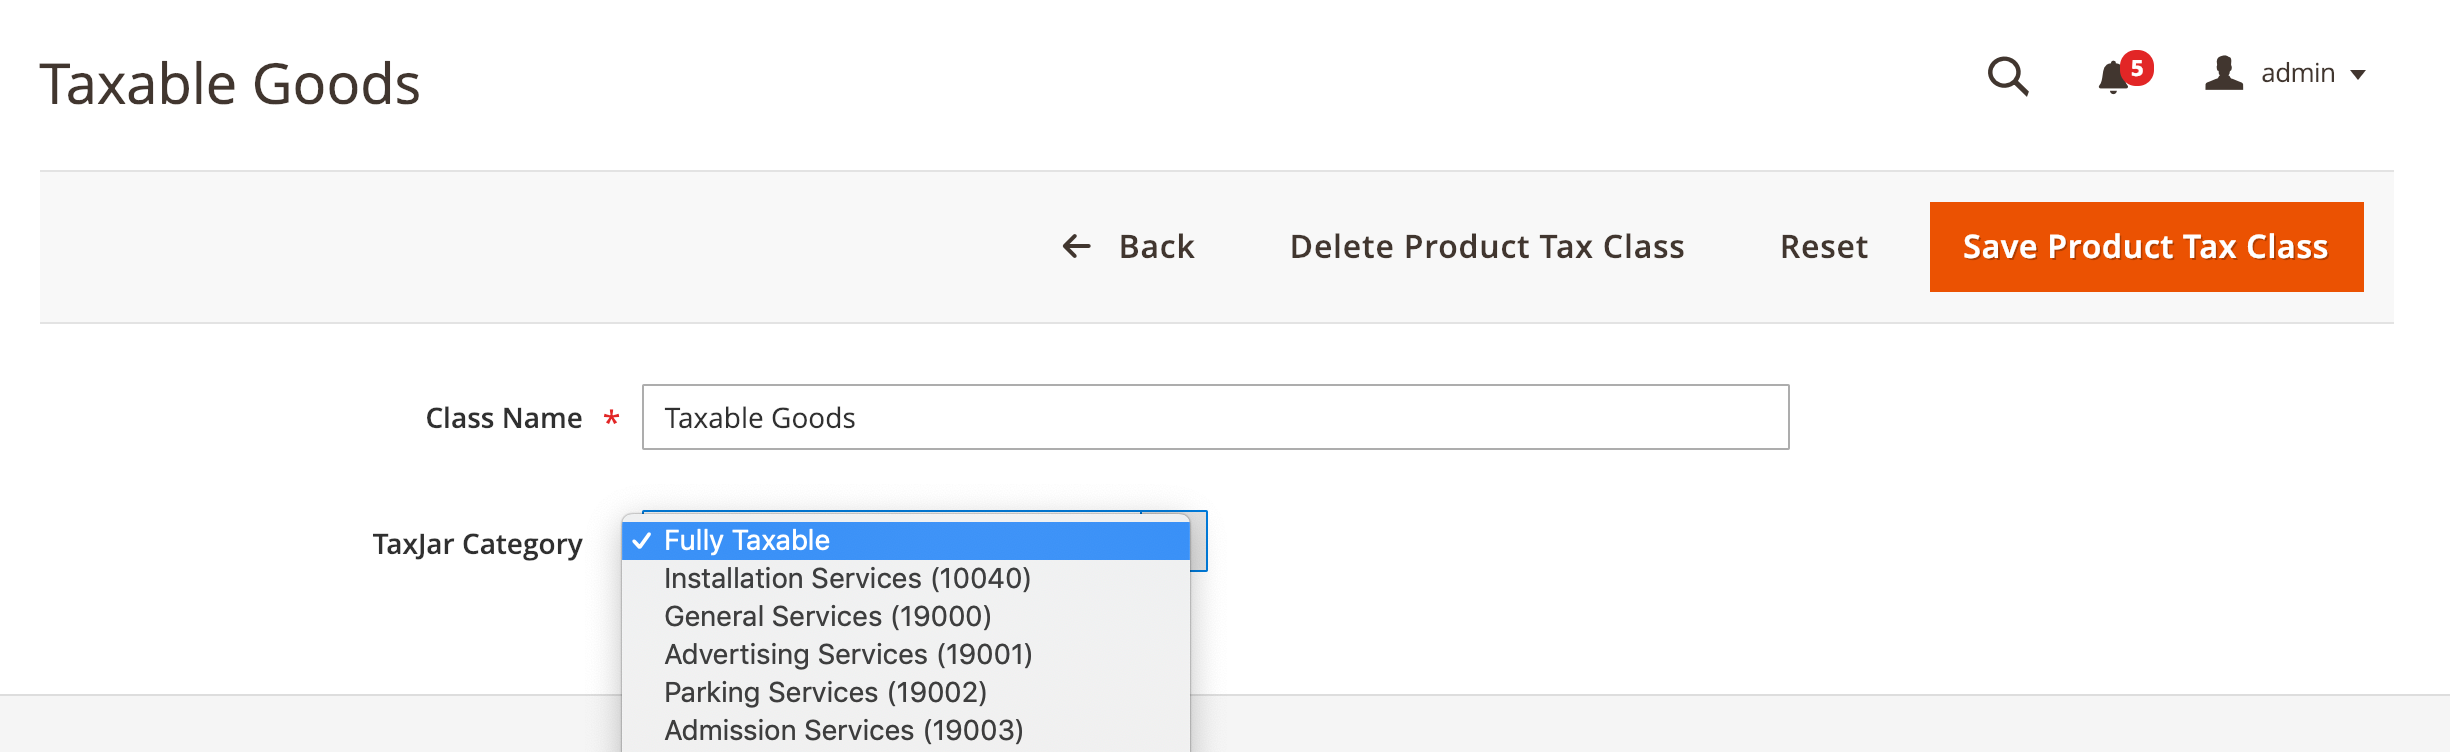
Select Clothing and click Save Product Tax Class. You now have clothing tax exemptions applied to all products assigned to the Taxable Goods class. This works for new or existing product tax classes. We leave the tax code assigning up to you and it’s completely optional.
For a list of product tax codes the TaxJar API currently supports, check out our category endpoint reference.
Customer Sales Tax Exemptions
To exempt a specific customer in Magento for calculations and reporting, edit the customer and update the TaxJar Exemption Type field with the appropriate exemption type:
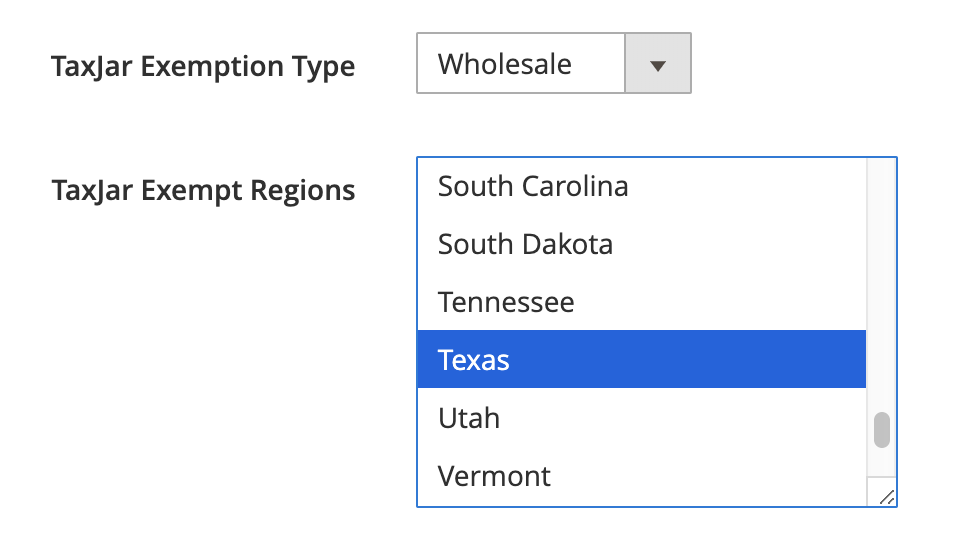
You can also select one or more TaxJar Exempt Regions to exempt the customer in specific regions / states. If no regions are selected, the customer will be exempt everywhere. To exempt multiple customers in bulk, use the customer admin grid to filter your customers and select the customers you’d like to exempt. From there, select an exemption type and click Save Edits:
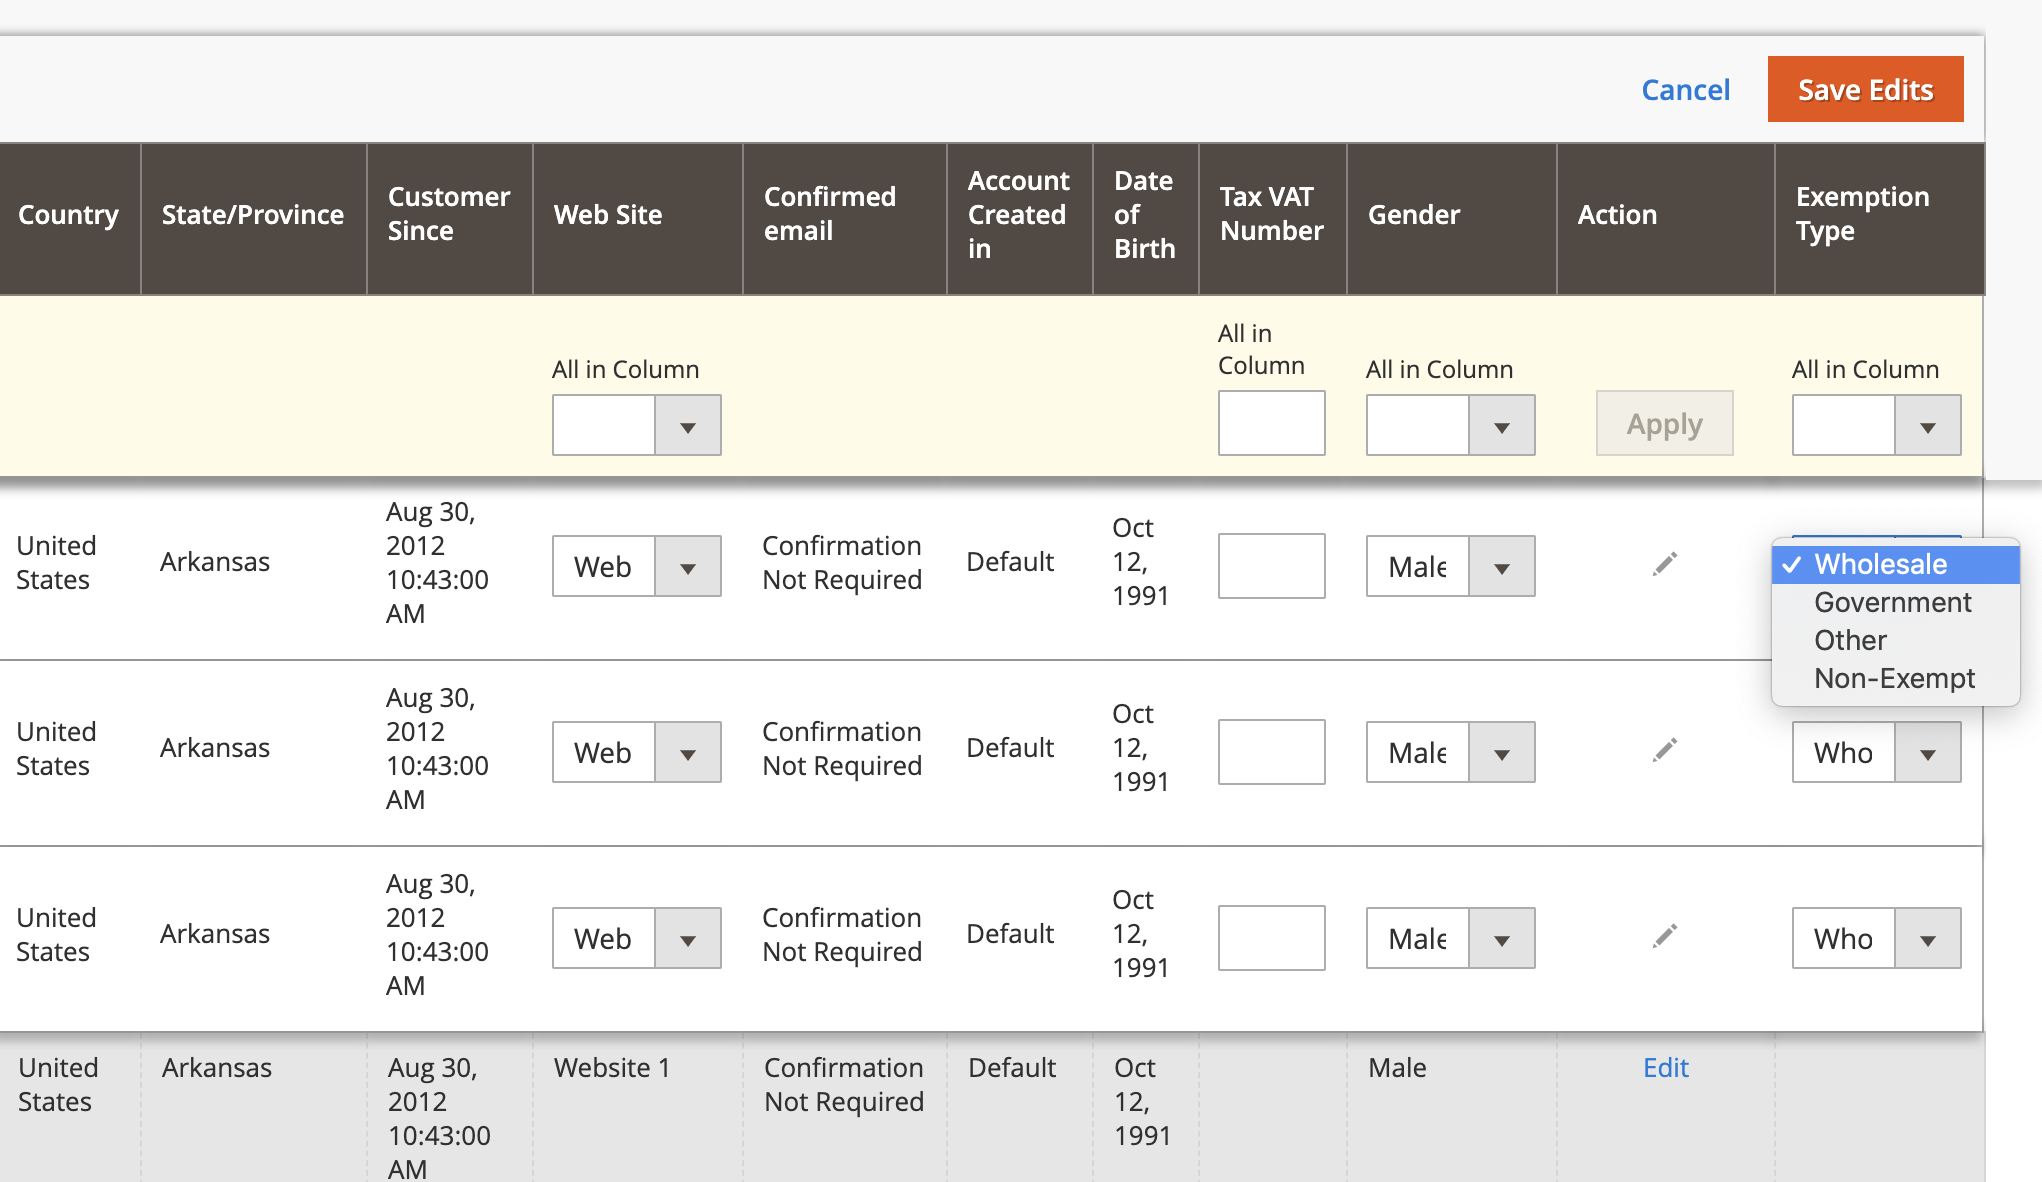
These customers will then be synced to TaxJar. After they’re synced over, they will be exempt from sales tax calculations at checkout and their transactions will be designated as exempt in the TaxJar app for reporting and filing.
Address Validation
TaxJar now offers address validation in Magento 2 to help increase the accuracy of sales tax calculations for your store. When tax rates are based on the buyer’s location, a valid shipping address is necessary to ensure the most accurate tax rate. After connecting to TaxJar with an eligible account, you’ll be able to enable address validation under Stores > Configuration > Sales > Tax:

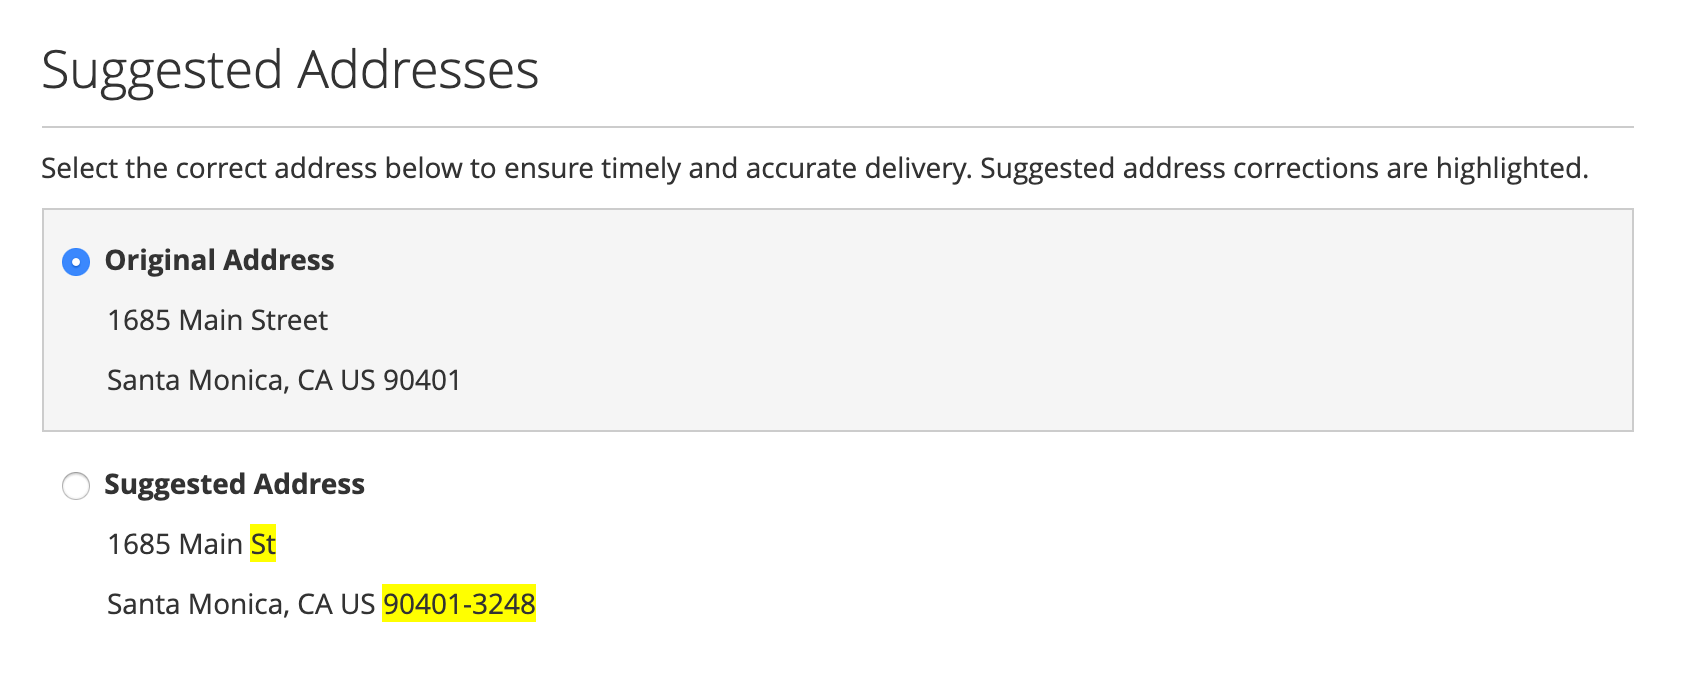
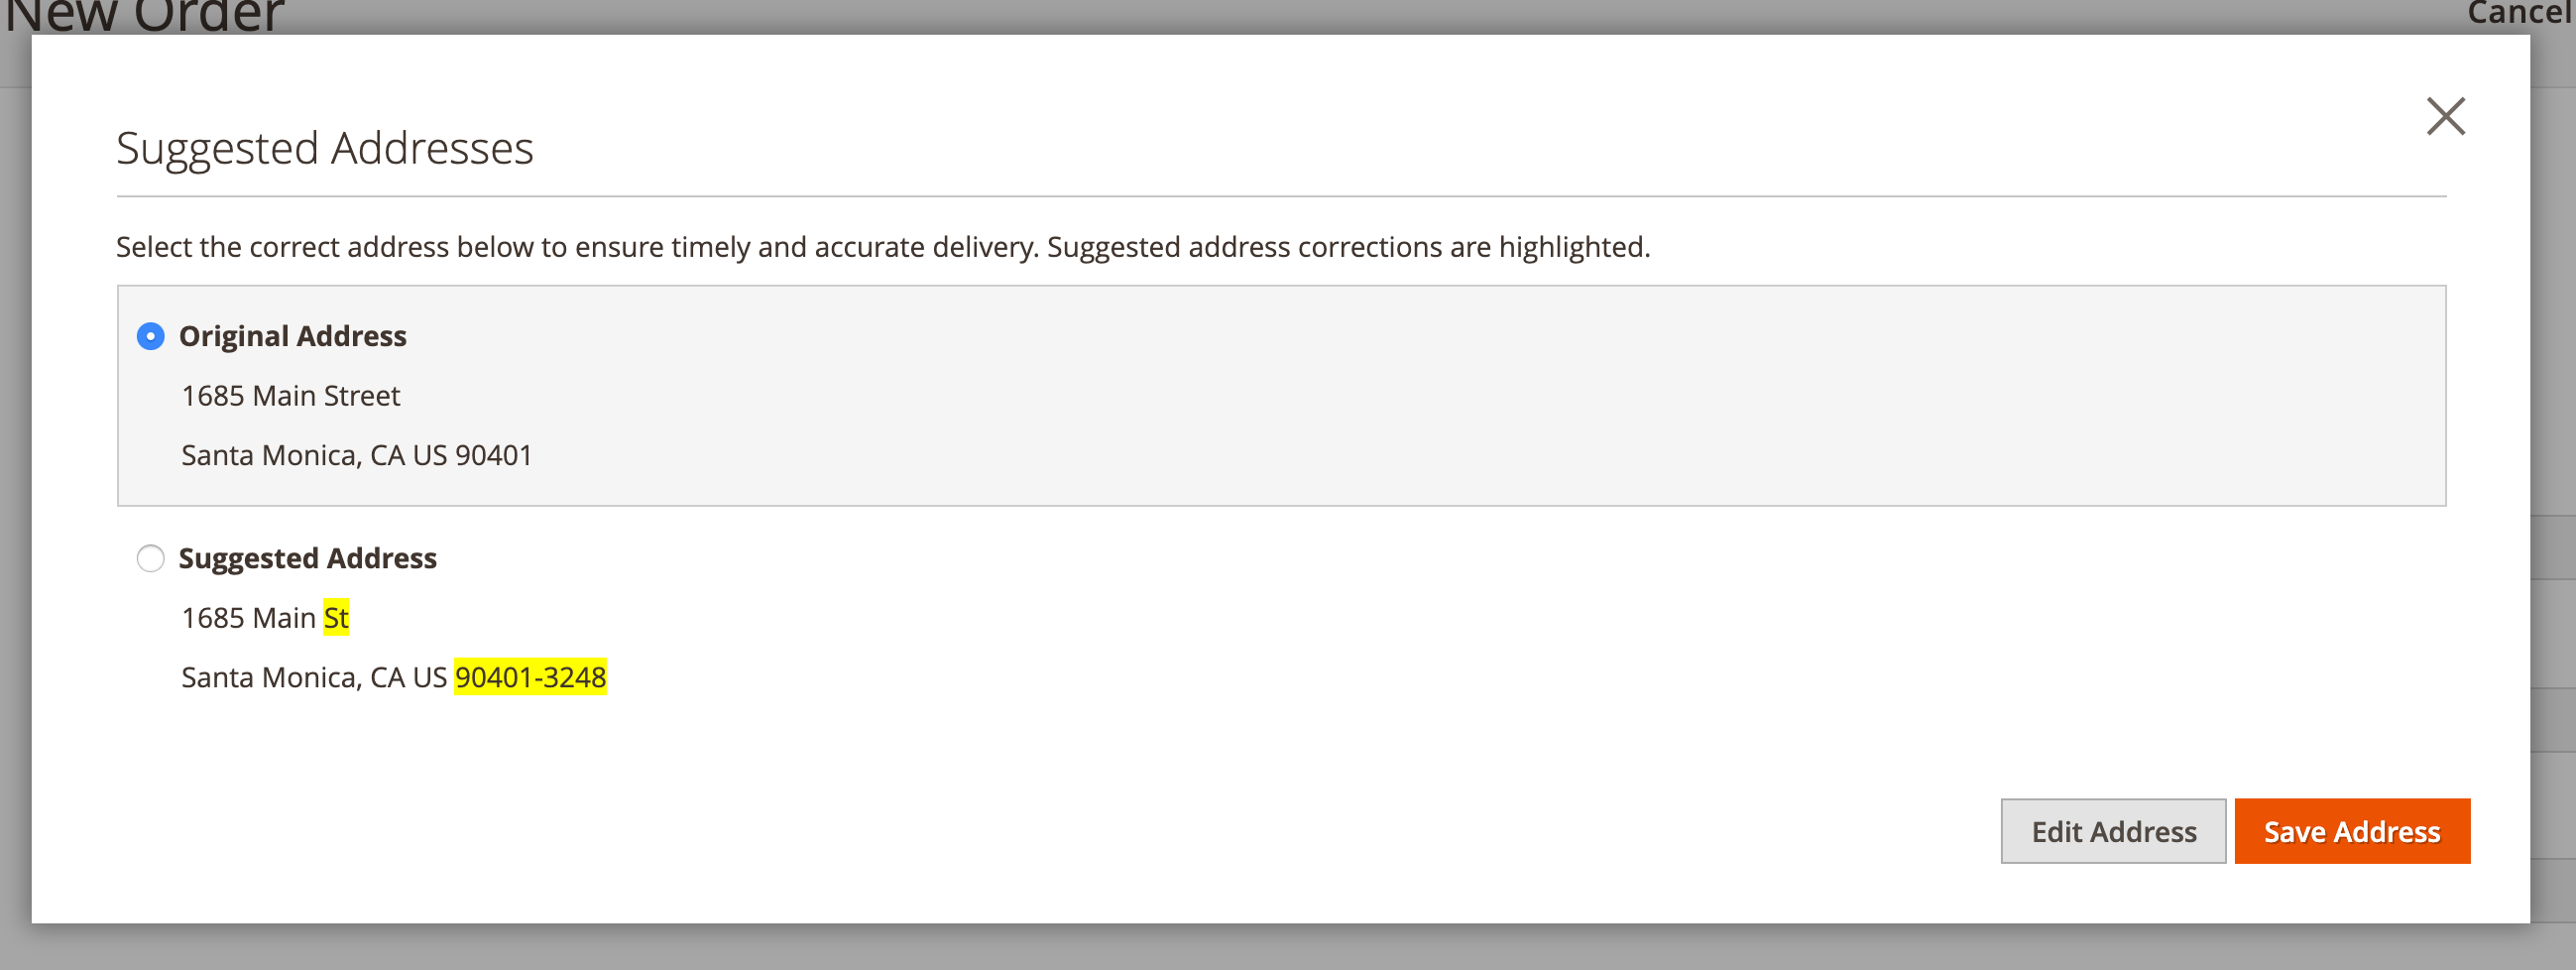
Once enabled, shipping addresses will be validated automatically at checkout and in the customer address book. At checkout, both guests and registered customers will see one or more suggested addresses directly after providing a shipping address:
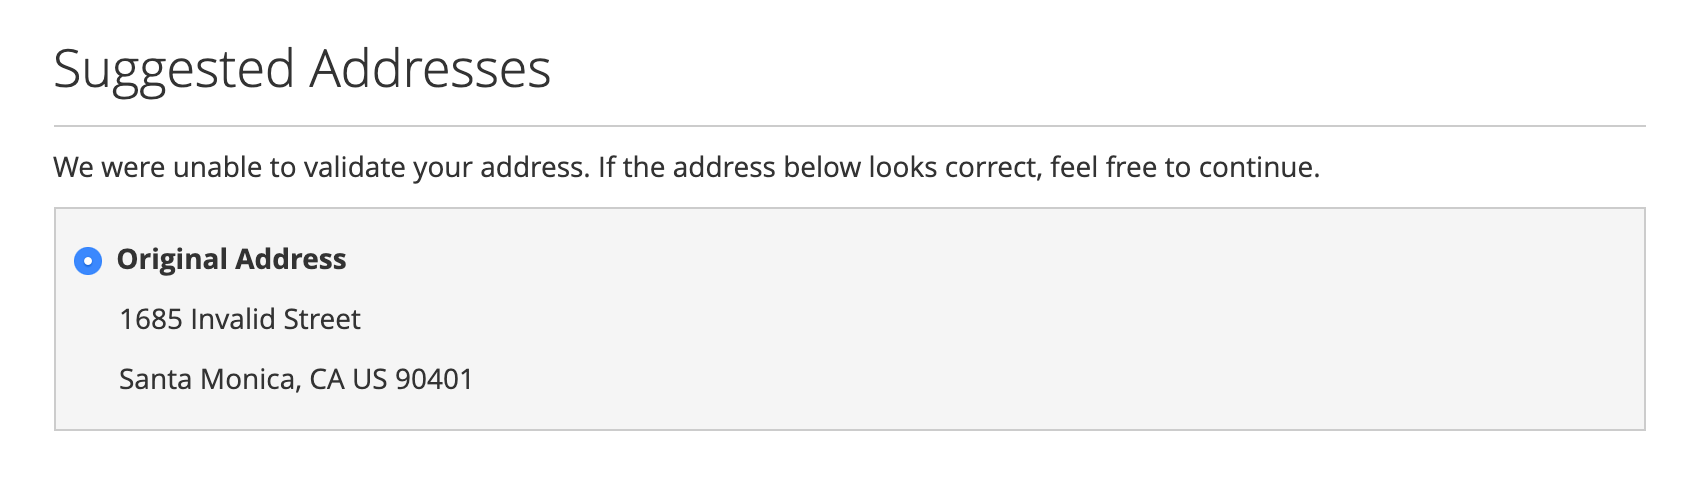
The address validation feature never blocks or interferes with the checkout process. It asynchronously provides address suggestions after the shipping address is entered. If the shipping address can not be found, the customer is asked to review their address or continue to the next step:
If the shipping address is fully validated, no suggested addresses are shown to the customer. After a suggested address is selected by the customer, the existing address may be updated on the following step, after a shipping method is selected, or when the order is submitted based on whether you’re using the native Magento checkout process or a 3rd party checkout extension.
Feel free to use your own stylesheet and customize the design of our suggested addresses section to better fit your Magento theme.
Address validation also works on the backend for order creation and customer management:
If you have multiple websites or stores, TaxJar’s address validation can now be configured individually across scopes. To selectively enable address validation, the feature should first be enabled globally before disabing the feature for individual websites or stores. Backend address validation functionality relies on the global scope’s configuration, so disabling the feature at the global scope will prevent address validation in views other than checkout.
Enabling the TaxJar API
By default Magento uses zip-based rates for calculating sales tax. When you calculate taxes by zip code, you may not be collecting the most accurate amount of sales tax. Zip codes can cover multiple districts, counties, cities, and even states/regions. These jurisdictions can have different rates. In addition, you may have product exemptions depending on what you’re selling and where. There’s limitations when you rely solely on a zip code for figuring out sales tax.
With the TaxJar API enabled you’ll get the most accurate sales tax rates based on the entire shipping address (not just zip code) with built-in support for shipping taxability, sourcing logic, itemized discounts, and product exemptions. Response times are fast (sub-75ms) with 99.99% uptime. Rest assured it won’t interrupt your checkout process.
Set Enabled for Checkout to Yes for live checkout calculations. Click the orange Save Config button. Upon saving, the TaxJar API will be used for calculations instead of Magento’s rate-based tables. However, we can still use those rate-based tables as a fallback just in case.
Backup Sales Tax Rates
We provide a fallback to Magento’s native zip-based rates in case our API becomes unresponsive. While that’s unlikely to happen, it’s always good to have a backup plan. Upon setting Backup Rates to Yes for the first time, you’ll be shown a screen similar to this:
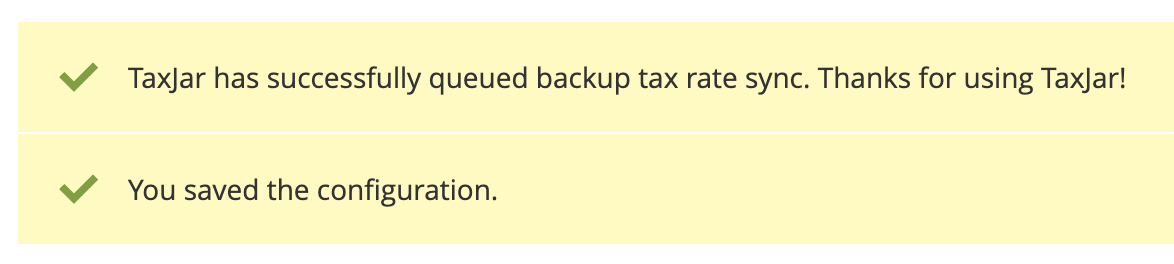
Since we’re typically downloading thousands of rates into your database at once, backup sales tax rates are handled asynchronously using Magento’s message queues and bulk operations. After starting the backup rate sync process by enabling the feature, you should receive a notification similar to this:

Magento 2 comes pre-configured to handle message queue consumers (since v2.2), so generally, you should only need to confirm that the default consumers_runner cron job is enabled. If you require a more granular configuration of message queues and particular consumers, read more on how to manage message queues.
Remember, you can always check the status of any bulk operation, including Backup Tax Rate operations, via the Bulk Actions Log under System > Bulk Actions.
You may notice that we import zip-based sales tax rates for each US state where you have nexus. If you decide to add a new nexus state under Stores > Nexus Addresses and would like to refresh your rates manually, just click the Sync Backup Rates button. It’s that simple. Otherwise, we’ll automatically refresh your backup rates on the first of each month to make sure they’re up-to-date.
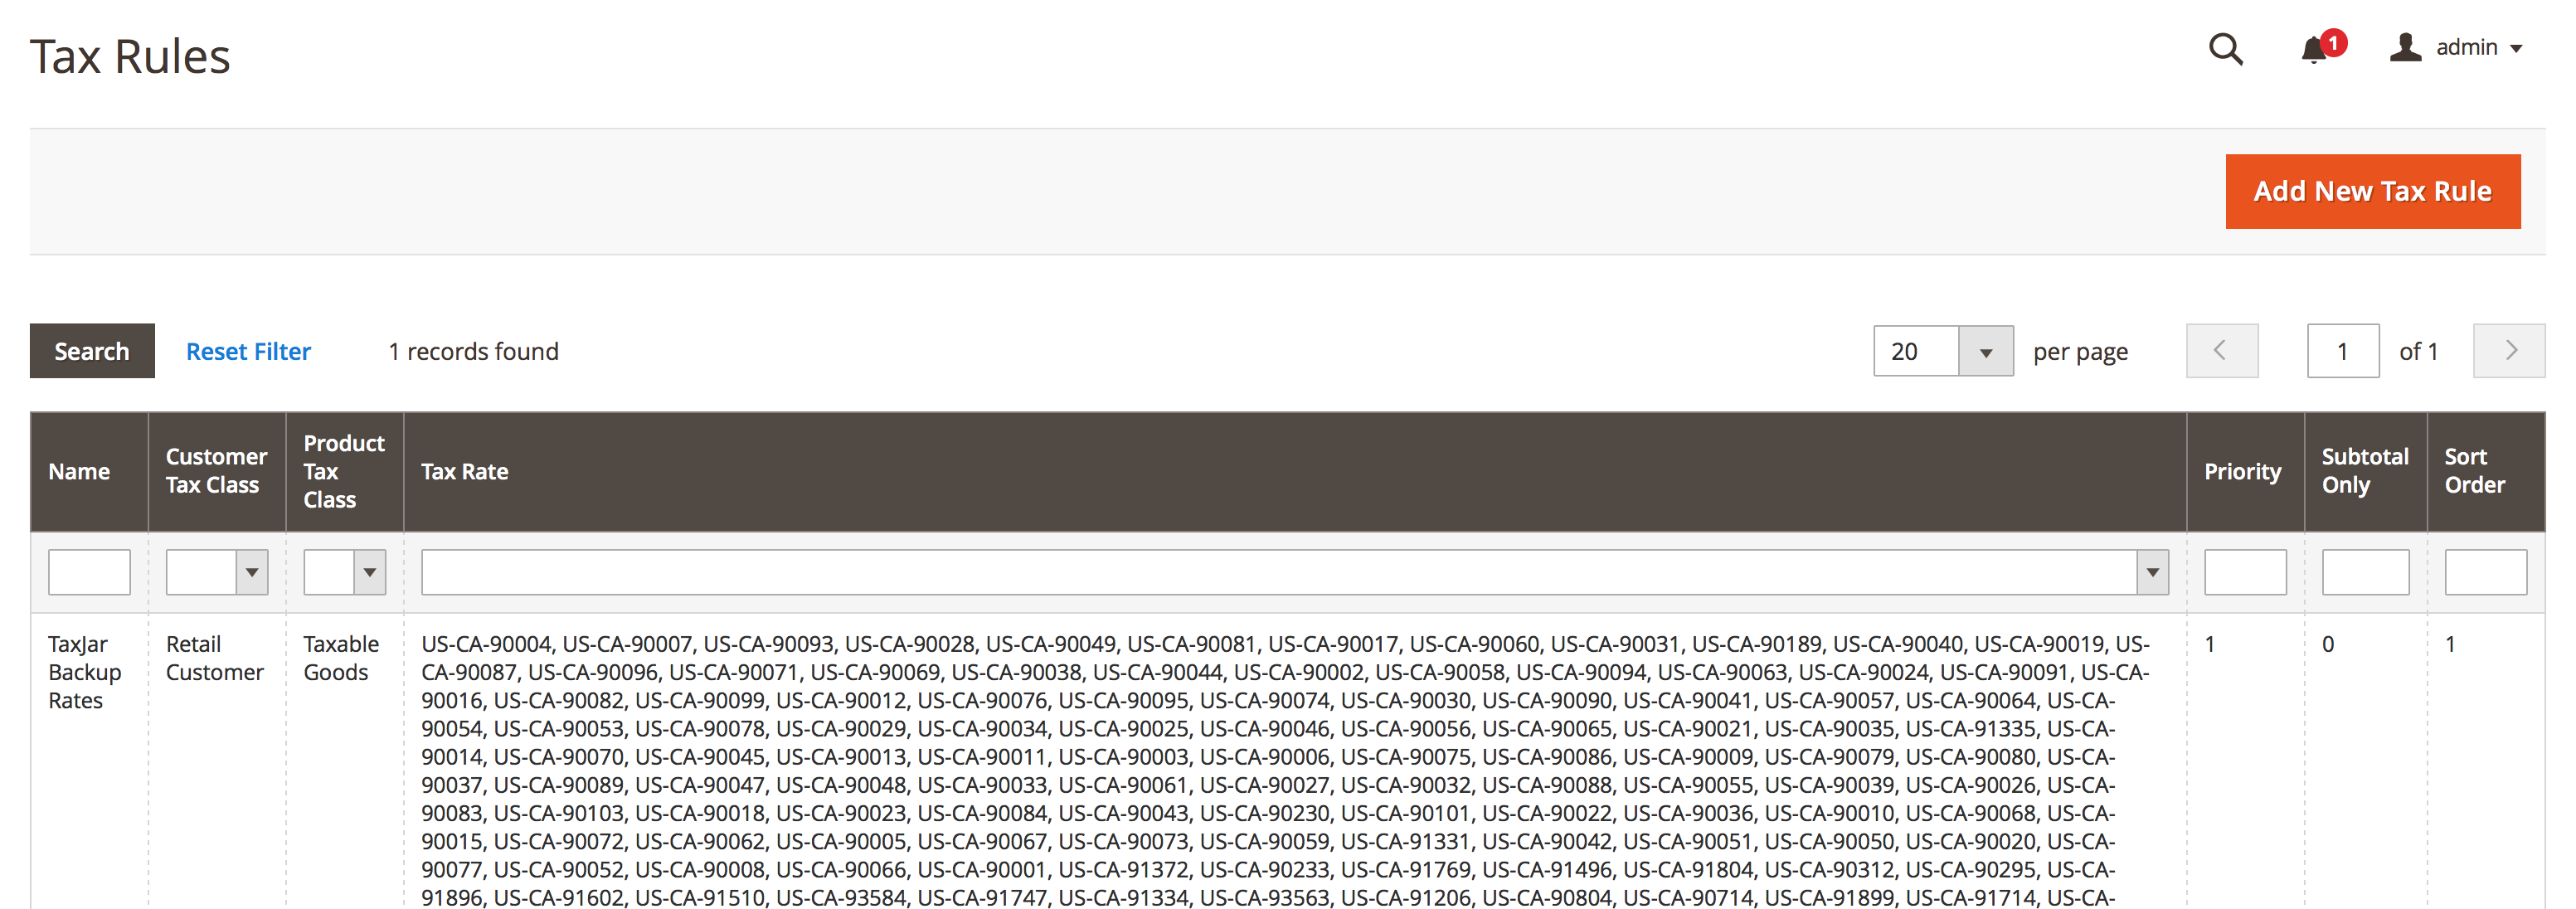
To verify sales tax rates and rules are loaded, go to Stores > Tax Rules. You should see your imported rates attached to a couple of sales tax rules:
Please keep in mind that we never remove non-TaxJar rates. This allows our merchants to use their own custom zip-based rates in Magento if needed. After removing a nexus state, if you had previously configured custom rates for the state in addition to TaxJar’s rates, you’ll still need to manually remove the custom rates because only TaxJar-imported rates will be removed automatically.
Also keep in mind, backup sales tax rates are configured globally for your Magento 2 installation. If you have multiple stores, there is currently no way to define separate backup tax rate behavior for separate store configurations. As such, only the global “default config” setting will be applied.
Backup Sales Tax Classes
If you’re taking advantage of our backup rates, make sure you select the appropriate product and customer tax classes under the TaxJar configuration. Usually this means you’ll want to select Taxable Goods and Retail Customer if you haven’t added your own custom classes.
Post-Import Configuration
After importing zip-based backup rates, TaxJar’s extension automatically does several things to help prepare you for collecting sales tax using Magento’s native calculations:
Shipping Taxability
Based on your shipping origin state configured under Shipping Settings > Origin, we set Magento’s native tax calculations to be based on origin or destination-based sourcing (e.g. your address of shipping origin or the customer’s shipping address).
This means we update a setting under Sales > Tax in your store configuration: Tax Calculation Based On. For most stores, Tax Calculation Based On will be set to Shipping Address. If your store’s shipping origin is origin-based (not destination), we’ll set it to Shipping Origin.
Keep in mind this setting only affects Magento’s native zip-based rates calculations. If you decide to enable the TaxJar API (live checkout calculations), this will only be used as a backup.
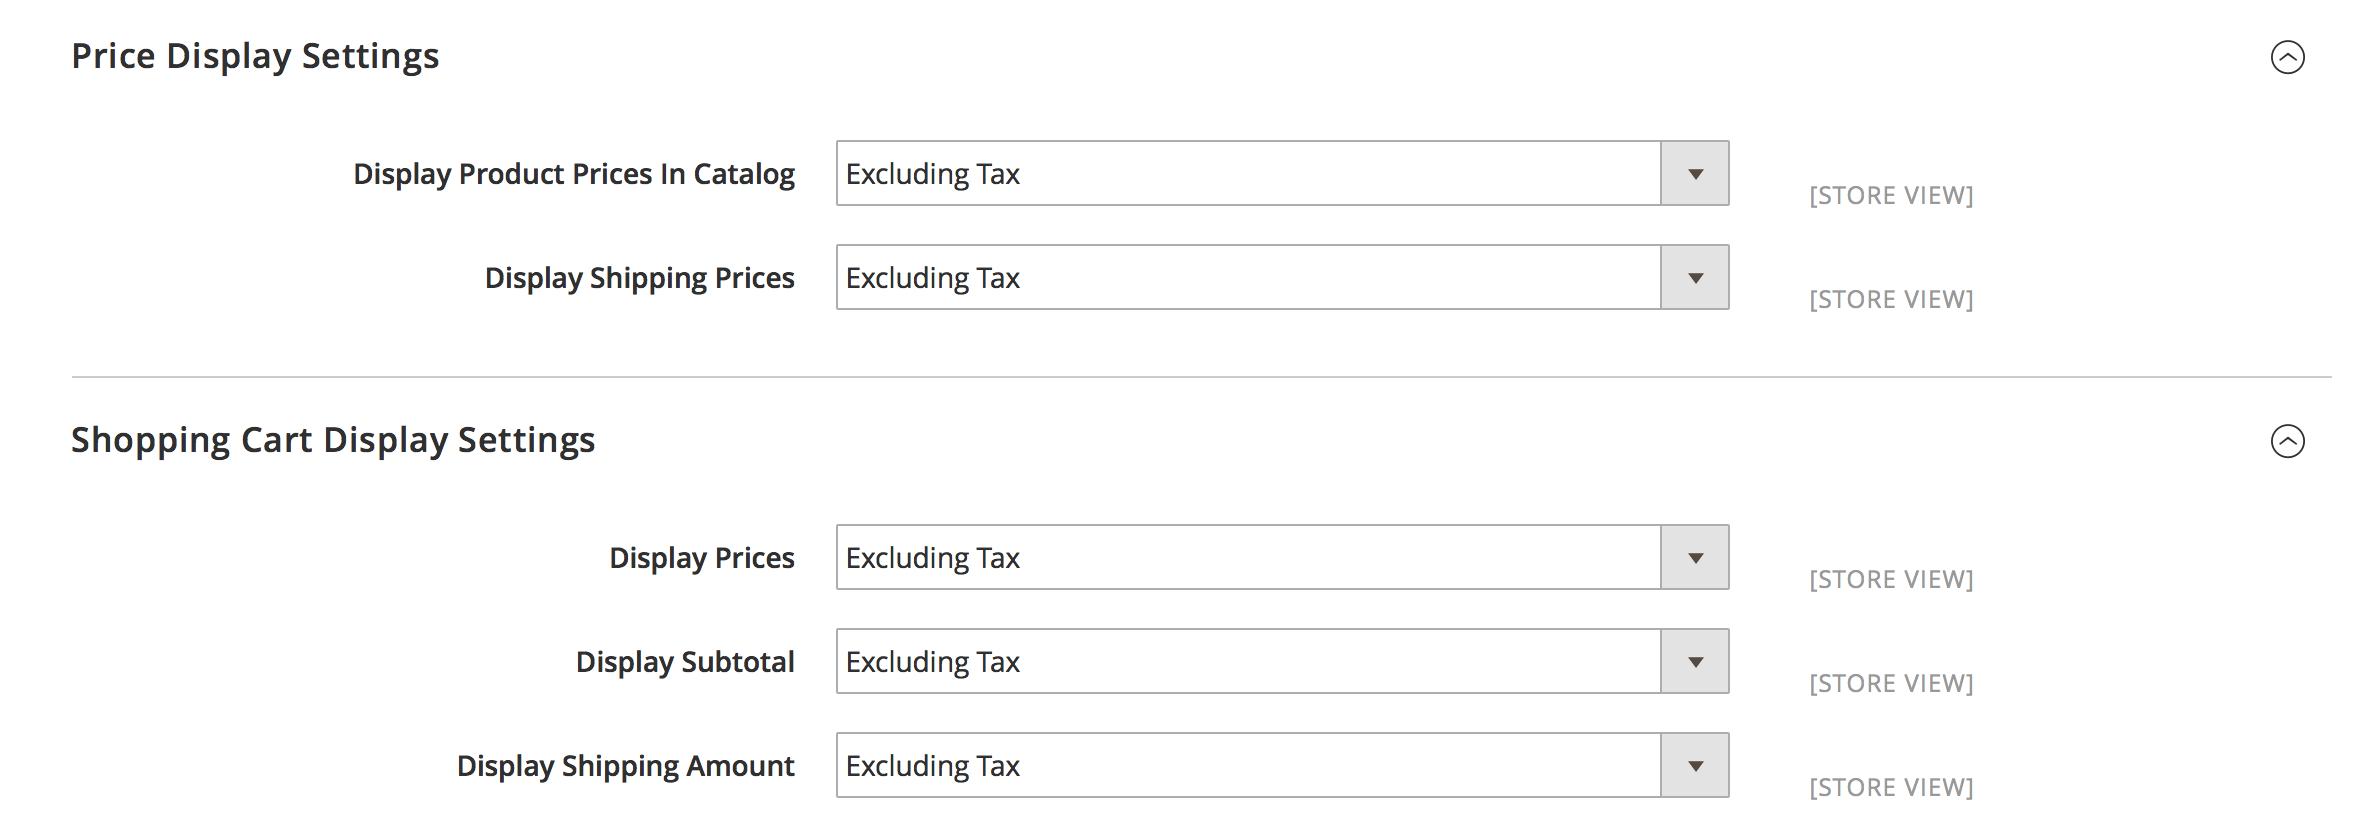
Tax Display Settings
Our extension sets the following tax display settings under Sales > Tax to Excluding Tax:
- Price Display Settings
- Display Product Prices in Catalog
- Display Shipping Prices
- Shopping Cart Display Settings
- Display Prices
- Display Subtotal
- Display Shipping Amount
For most stores, these settings will already be set to Excluding Tax.
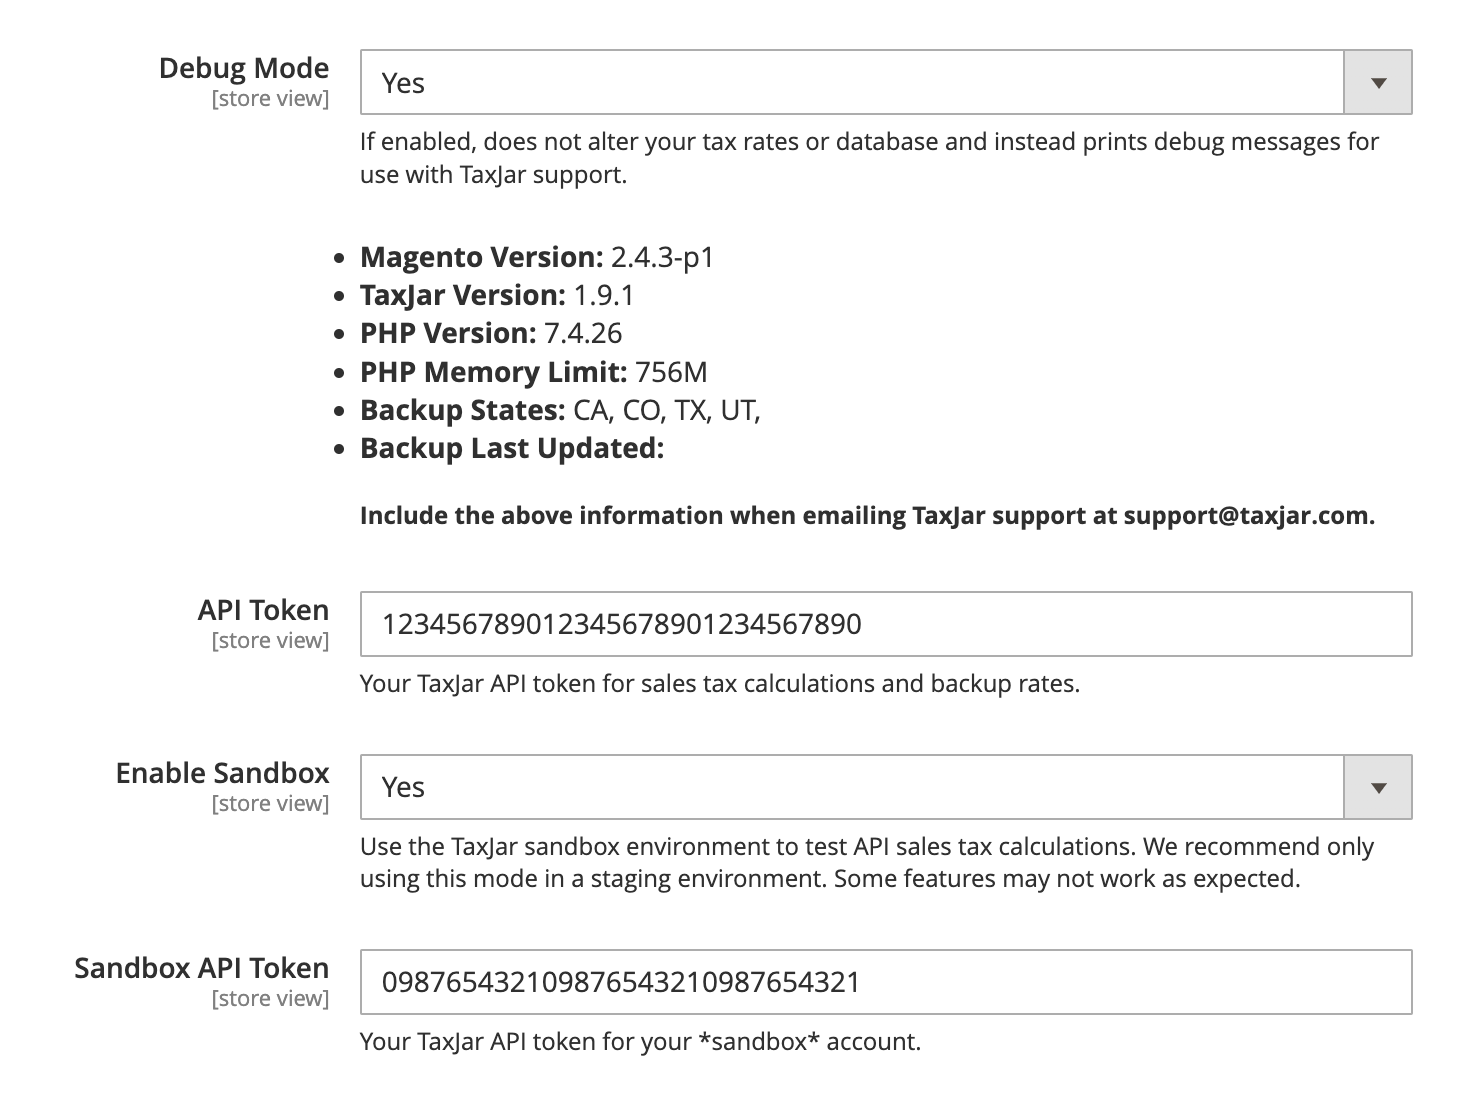
Debug Mode
If you need to contact support, enabling debug mode shows you diagnostic information about your Magento store and the TaxJar extension itself. It also prevents the extension from downloading zip-based rates into your store.
Debug mode also allows you to enable the Sandbox environment. TaxJar provides a sandbox environment on all TaxJar Professional or higher plans for automated testing and development. Be careful! The Sandbox environment should only be used for testing and never enabled on a production store.
To help us help you, take a screenshot of the debug mode message and include it in your support email if you’re having difficulties. Disable it afterwards if you want to continue importing rates.
Multi-Store Calculations
If you have multiple websites or stores with different nexus addresses, you can assign nexus addresses to specific store views. Select the nexus address from Stores > Nexus Addresses and update the Store View dropdown:

By default a nexus address will be assigned to “All Store Views” and applied globally. Keep in mind that the same one address restriction applies to nexus addresses at the store level. For example, you can’t add a separate nexus location in California for one of your stores if you already have a global nexus location for California.
You can also supply different shipping origins per website. Shipping origins are used to help determine sourcing for sales tax calculations. Make sure you review your shipping origins under Stores > Configuration > Sales > Shipping Settings > Origin.
Sales Tax Reporting
We’re almost done setting up TaxJar with your Magento 2 store. If you’re interested in sales tax reporting and automated filing, proceed!
The latest version of our extension now supports real-time transaction syncing between TaxJar and Magento 2. Once your order is invoiced and shipped from the Magento admin panel, it’s automatically synced to TaxJar through our TaxJar API. On subsequent changes, the order is updated. Separate refunds are created for each credit memo in the order. We only sync orders with a complete or closed order state.
Setting Up Sales Tax Reporting
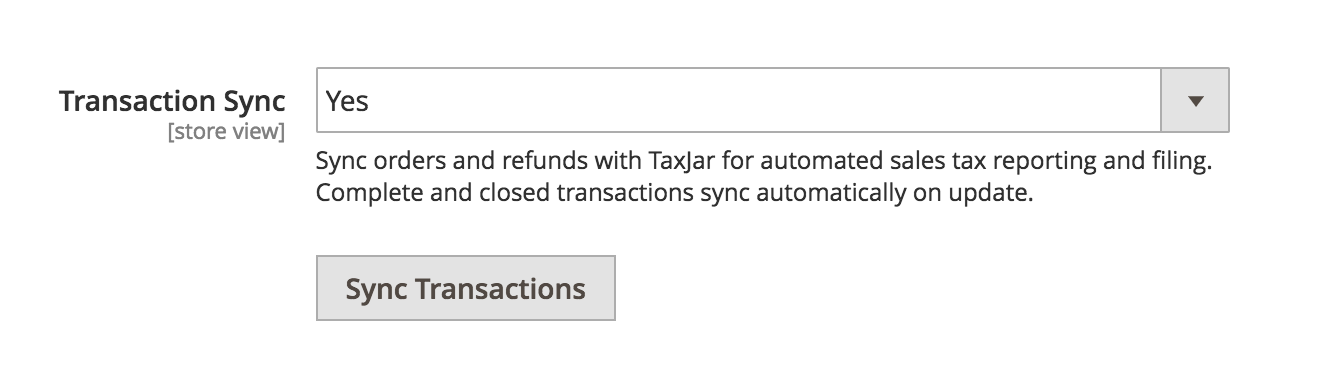
To begin syncing transactions with TaxJar, go to Stores > Configuration from the main menu. Select Tax under the Sales configuration menu on the left. Under TaxJar, you’ll find a Transaction Sync setting:
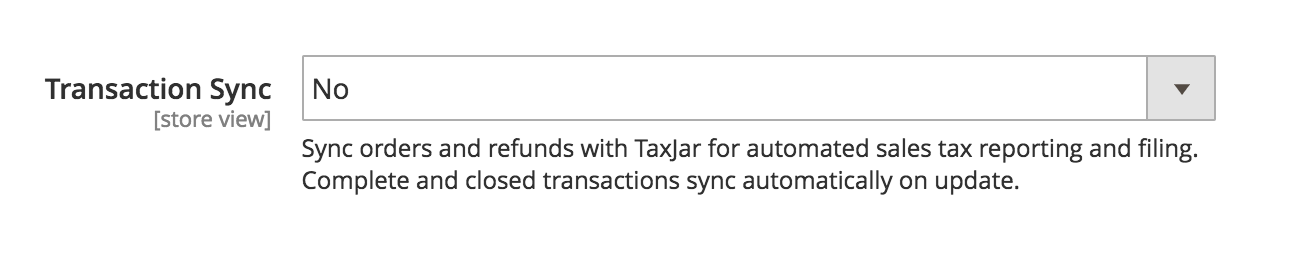
Click the Transaction Sync dropdown and select Yes. In order to sync transactions with TaxJar, we require a 30 day reporting trial or paid TaxJar subscription.
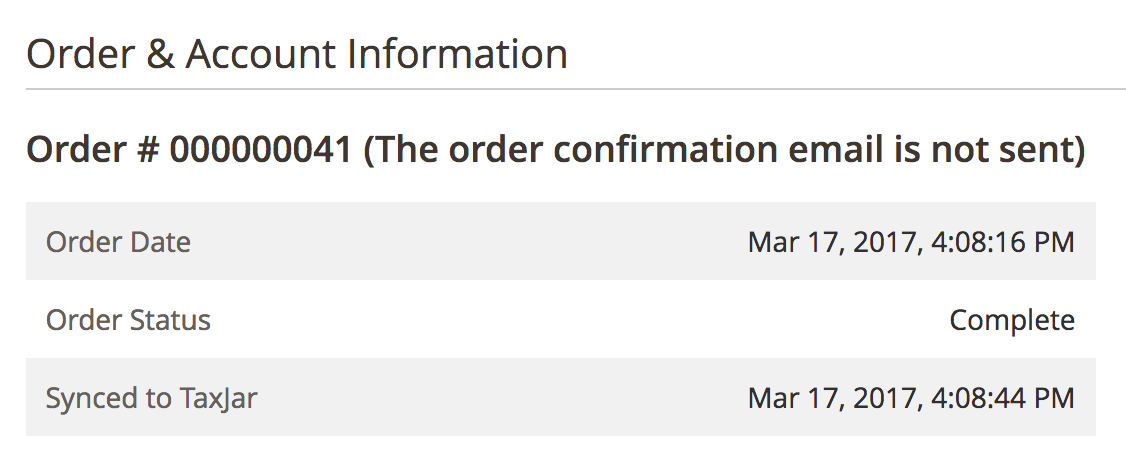
That’s it! Future orders will now be synced to TaxJar once they transition into a complete or closed order state. To see when a transaction was synced, go to the individual order or credit memo in your admin panel. You’ll find a Synced to TaxJar row in the summary with the sync date:
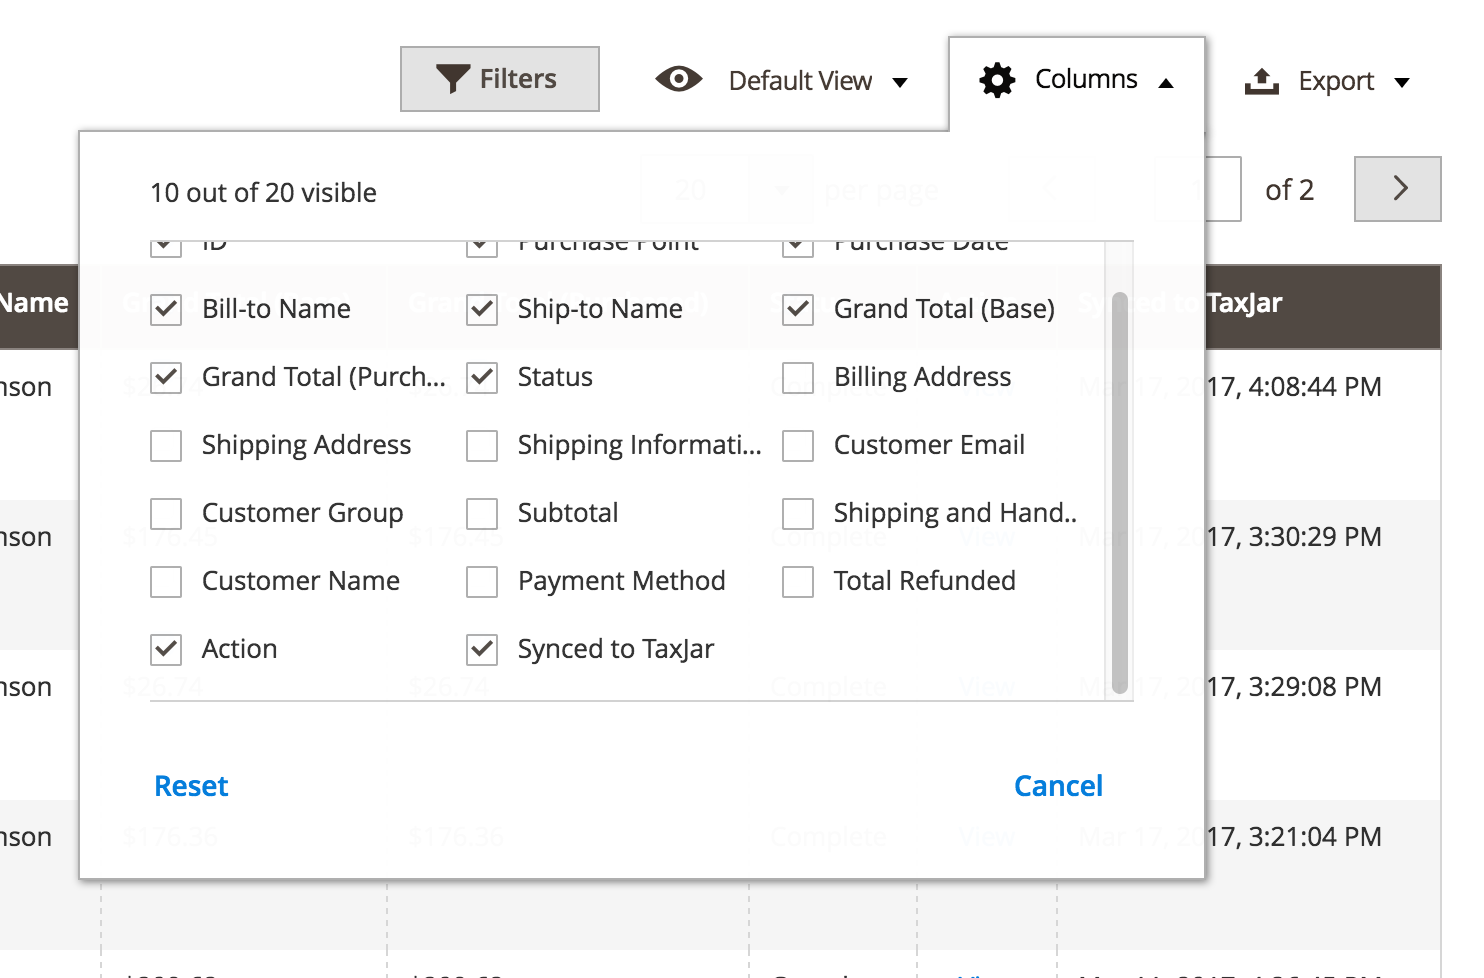
You can also browse through your orders and credit memos with the Synced to TaxJar grid column. This is turned off by default, so you’ll need to customize your grid to show it:
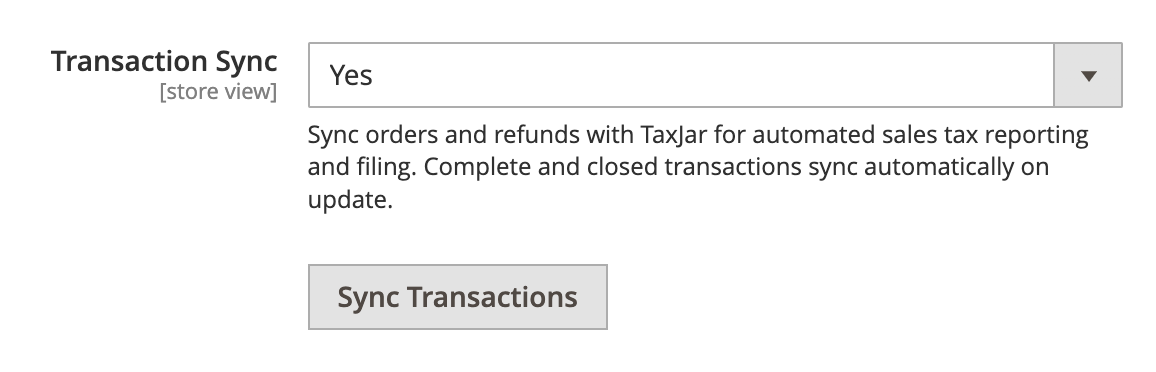
Backfilling Transactions
Now that we’re syncing transactions, it’s likely that you have previous Magento orders that haven’t been synced to TaxJar yet. To backfill transactions, click the Sync Transactions button that’s shown after you enable Transaction Sync:
A modal window will slide in, allowing you to pick a date range of orders you’d like to sync:
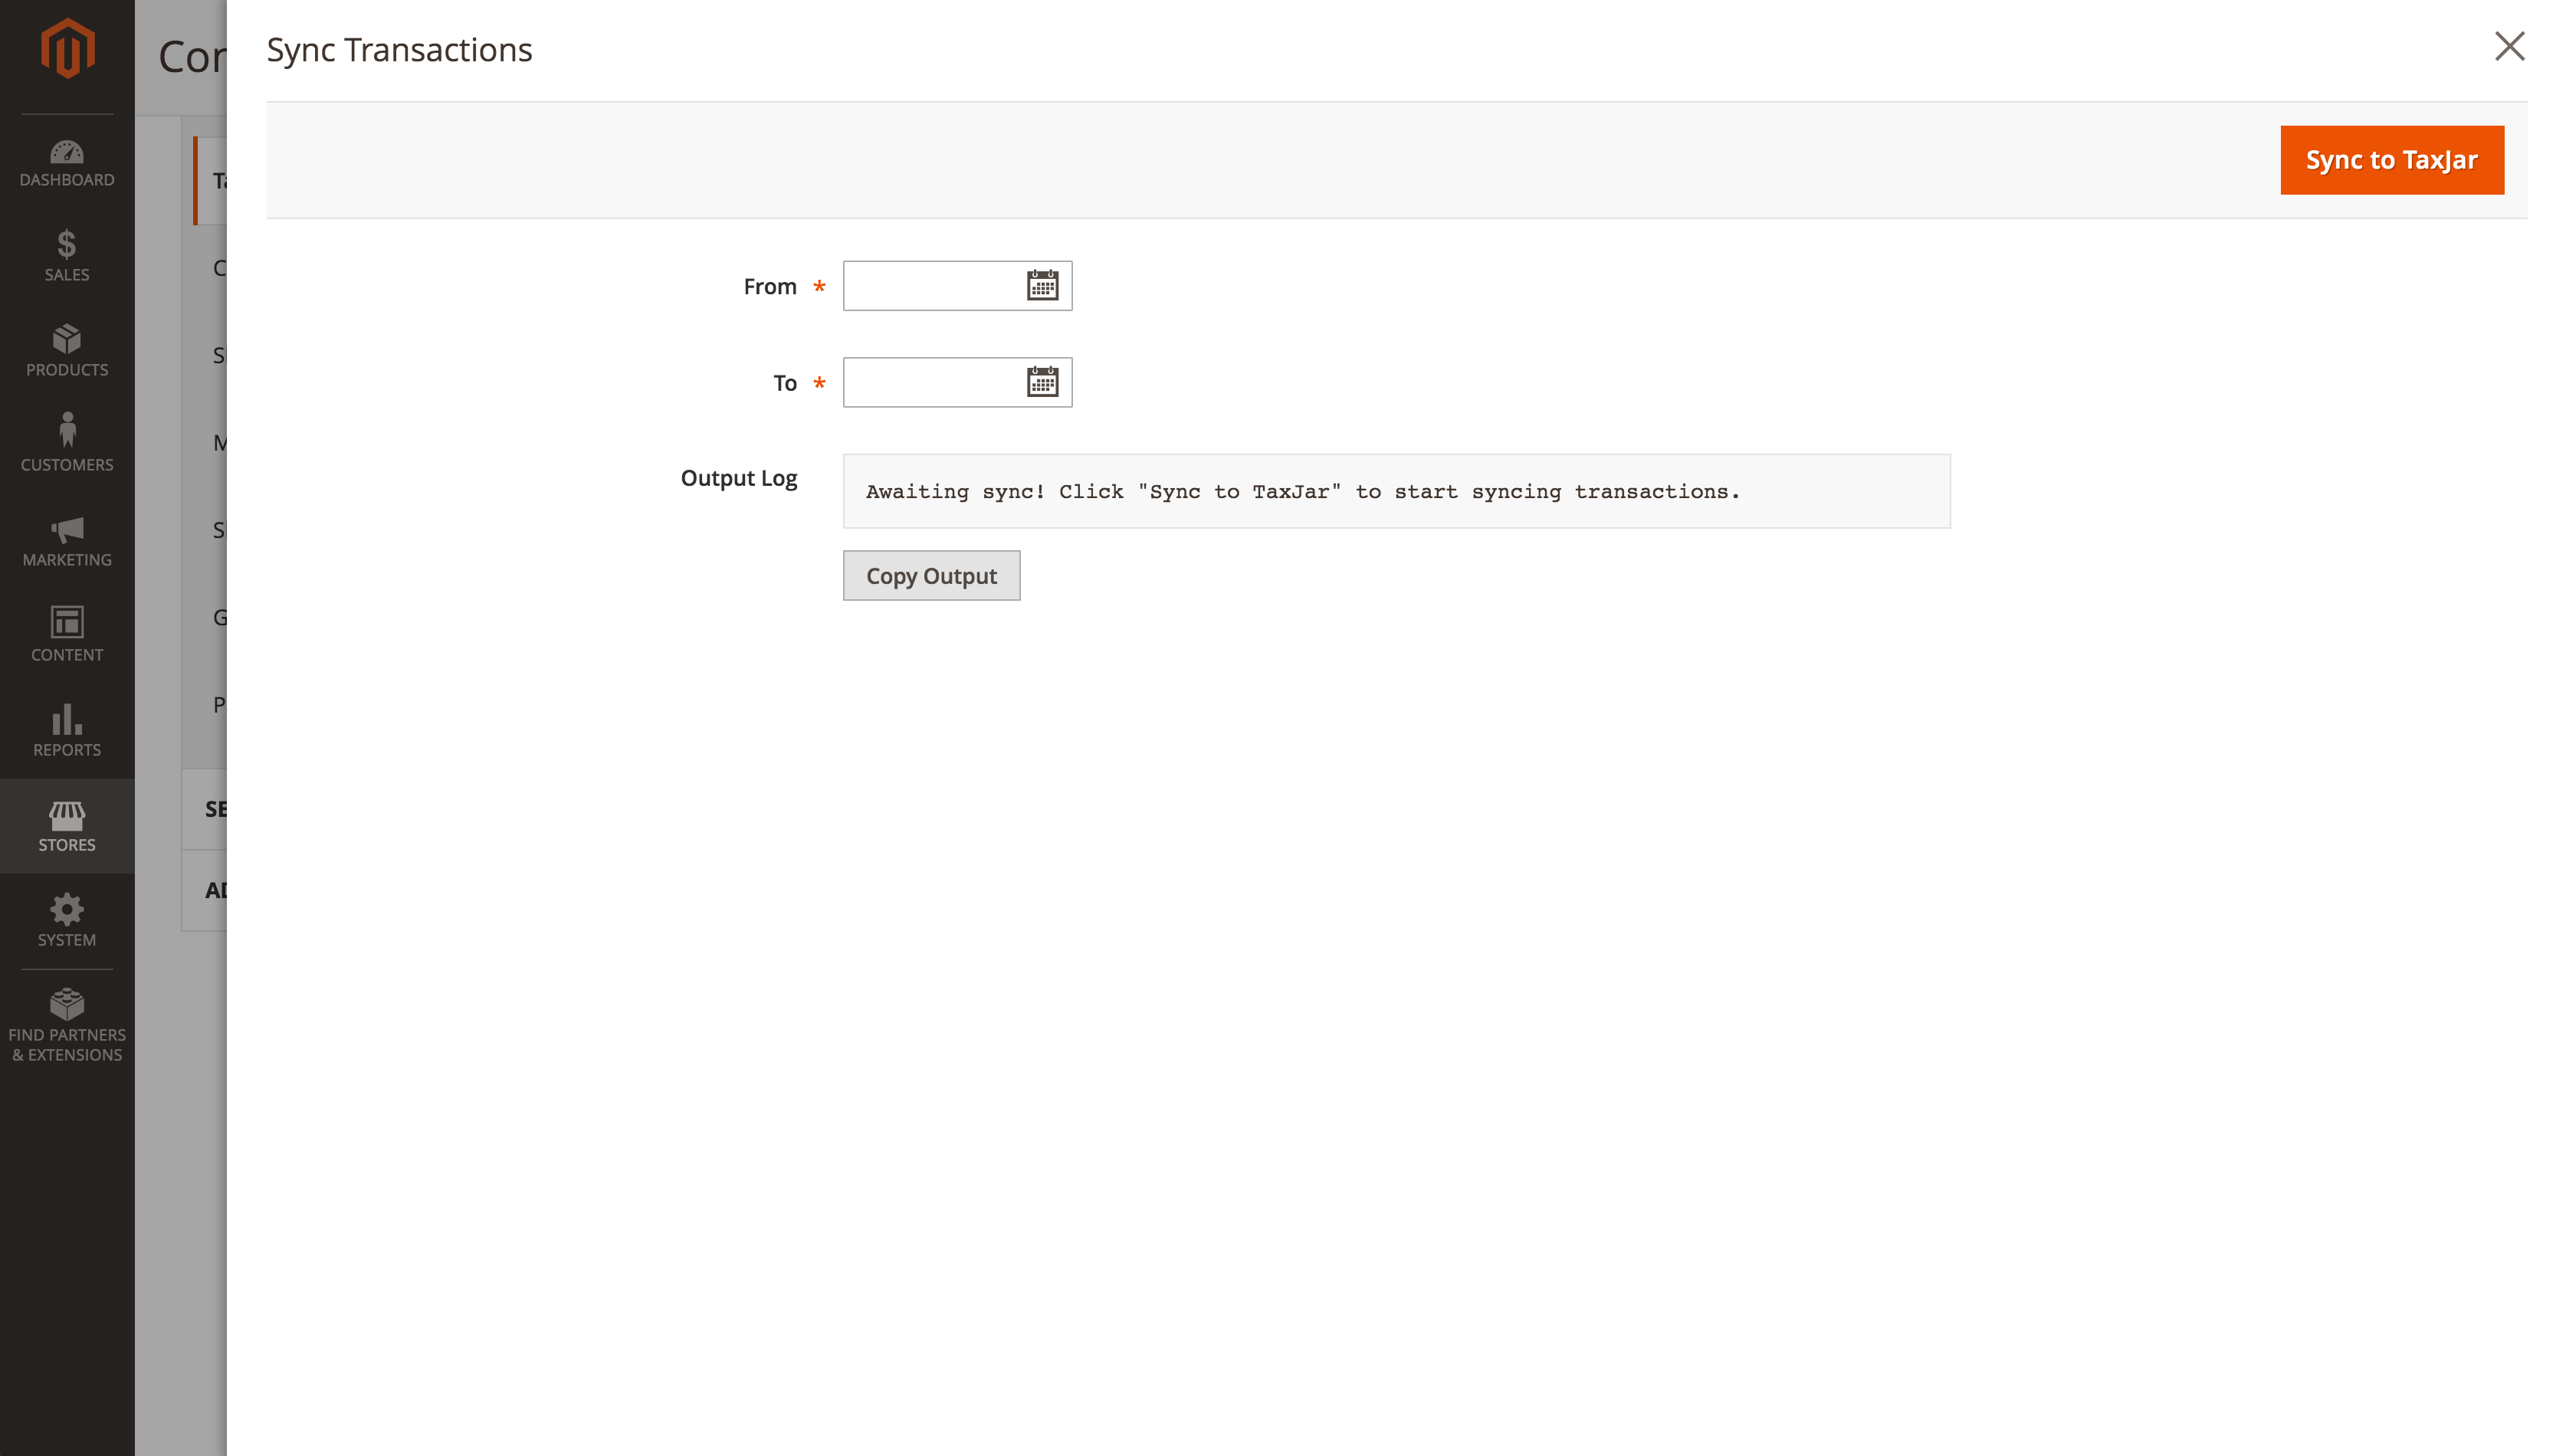
After selecting the From and To states, click the orange Sync to TaxJar button. We’ll look for complete and closed orders updated within that date range and push them to TaxJar. Once the process is finished, you’ll be able to view a log of what happened.
Whenever a transaction is synced to TaxJar, it’s recorded in a log file for your reference. You can find the log file at /var/log/taxjar.log.
Multi-Store Transaction Sync
Agencies or merchants with multiple business entities across different websites or stores can now use multiple TaxJar accounts to sync their transactions from a single Magento instance. To get started, go to Stores > Configuration from the main menu. Select Tax under the Sales configuration menu on the left. Switch to one of your stores using the “Store View” dropdown.
From there, you’ll want to scroll down the page to enable Debug Mode in the TaxJar module. Once the API Token field is visible, replace the existing API token with another TaxJar API token. Click the Save Config button and turn off Debug Mode. Now any order or credit memo processed through that store will be synced to a different TaxJar account for reporting and filing.
Wrapping Up
You’ve finished setting up TaxJar and Magento 2! At this point you should be collecting sales tax in your Magento store and syncing orders to TaxJar for reporting. From here on out this guide becomes more in-depth to explain what we’re doing behind the scenes. If you’re curious, feel free to read on.
How the TaxJar API Works
Your store seems to be calculating sales tax correctly, but now you might be wondering several things:
- How many TaxJar API calls will be made per order?
- What happens if the TaxJar API goes down or becomes unresponsive?
- How does the TaxJar API handle my custom / international rates?
- Will the TaxJar API work with my other extensions?
- How often do the zip-based rates refresh?
Our extension only makes live API calls when the order resides in a state where you have nexus. This saves you a lot of API calls and money. Additionally, API calls are cached until the checkout data changes. So if you have a customer repeatedly loading the checkout page without changing their shipping info, your store will not make additional API calls. On average, the TaxJar API integration will make 2-3 API calls per order in a nexus state. If you allow customers to estimate their shipping and tax on the cart page, that’s included.
API calls are only made under 3 circumstances:
- Checkout process for a nexus state
- Cart shipping and tax estimate for a nexus state
- Refreshing zip-based backup rates in the admin panel
If the order does not reside in a nexus state, the TaxJar API will fall back to Magento’s zip-based rate tables. This gives you the opportunity to use custom or international rates for regions where you may have nexus that TaxJar either doesn’t support yet or you’d rather handle it yourself.
In the unlikely event that the TaxJar API goes down or times out after 10 seconds, Magento’s native calculations will kick in using the backup rates as well.
Our TaxJar API integration extends the \Magento\Tax\Model\Sales\Total\Quote\Tax model and overrides Magento’s native calculations only if checkout calculations are enabled. If you’re using a third-party checkout extension or something else that may rely on Magento’s internal rate tables (such as multi-warehouse inventory), try out TaxJar’s extension on a test or staging server before deploying to production.
Your zip-based rates will refresh automatically on the first of each month via cron job. You can manually refresh these rates yourself by re-saving the TaxJar extension configuration. Each refresh counts as one API call.
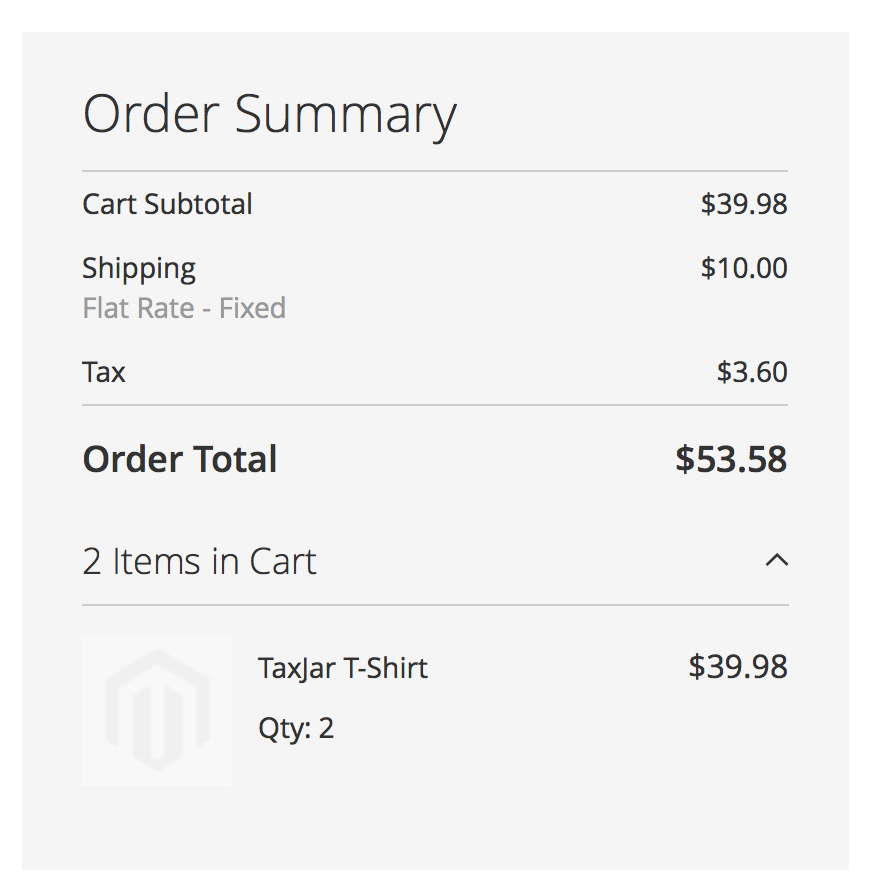
After a customer completes an order using the TaxJar API, our extension will record the sales tax amount and rate by line item in your database. If your store allows multiple currencies, the sales tax will be converted to the customer’s currency:

How Reporting Works
After enabling Transaction Sync in your TaxJar extension configuration, we’ll automatically sync orders to your TaxJar account once they’re fully invoiced and shipped. This happens immediately after the order transitions into a complete or closed state using the sales_order_save_after event. Credit memos are synced after the associated order is synced. We support both partial and full refunds in TaxJar.
Sync requests go through our TaxJar API using the transaction endpoints. Once an order is synced, we save the timestamp in your database to ensure the order is only synced again after it’s updated. In the unlikely event that we can’t sync an order, no timestamp will be shown in the individual order view. You’ll need to backfill the transaction later if you don’t see the timestamp or can’t find the order in TaxJar.
Transaction API requests and responses are recorded in a custom log file located at /var/log/taxjar.log. This log file contains the sync history for both backfilled and new transactions. You can use taxjar.log for debugging or reaching out to TaxJar support if you experience any issues.
CLI Commands
TaxJar now provides a command in the Magento CLI for developers to sync transactions:
bin/magento taxjar:transactions:sync
By default this command will backfill the previous day’s updated orders in a complete or closed state. Additionally, you can provide from and to arguments to sync a date range:
bin/magento taxjar:transactions:sync 01/01/2018 01/31/2018
We recommend merchants use this CLI command when there is a need to increase PHP memory limit, sleep between date ranges, run the command in a bash script, or schedule the command using a cron job.
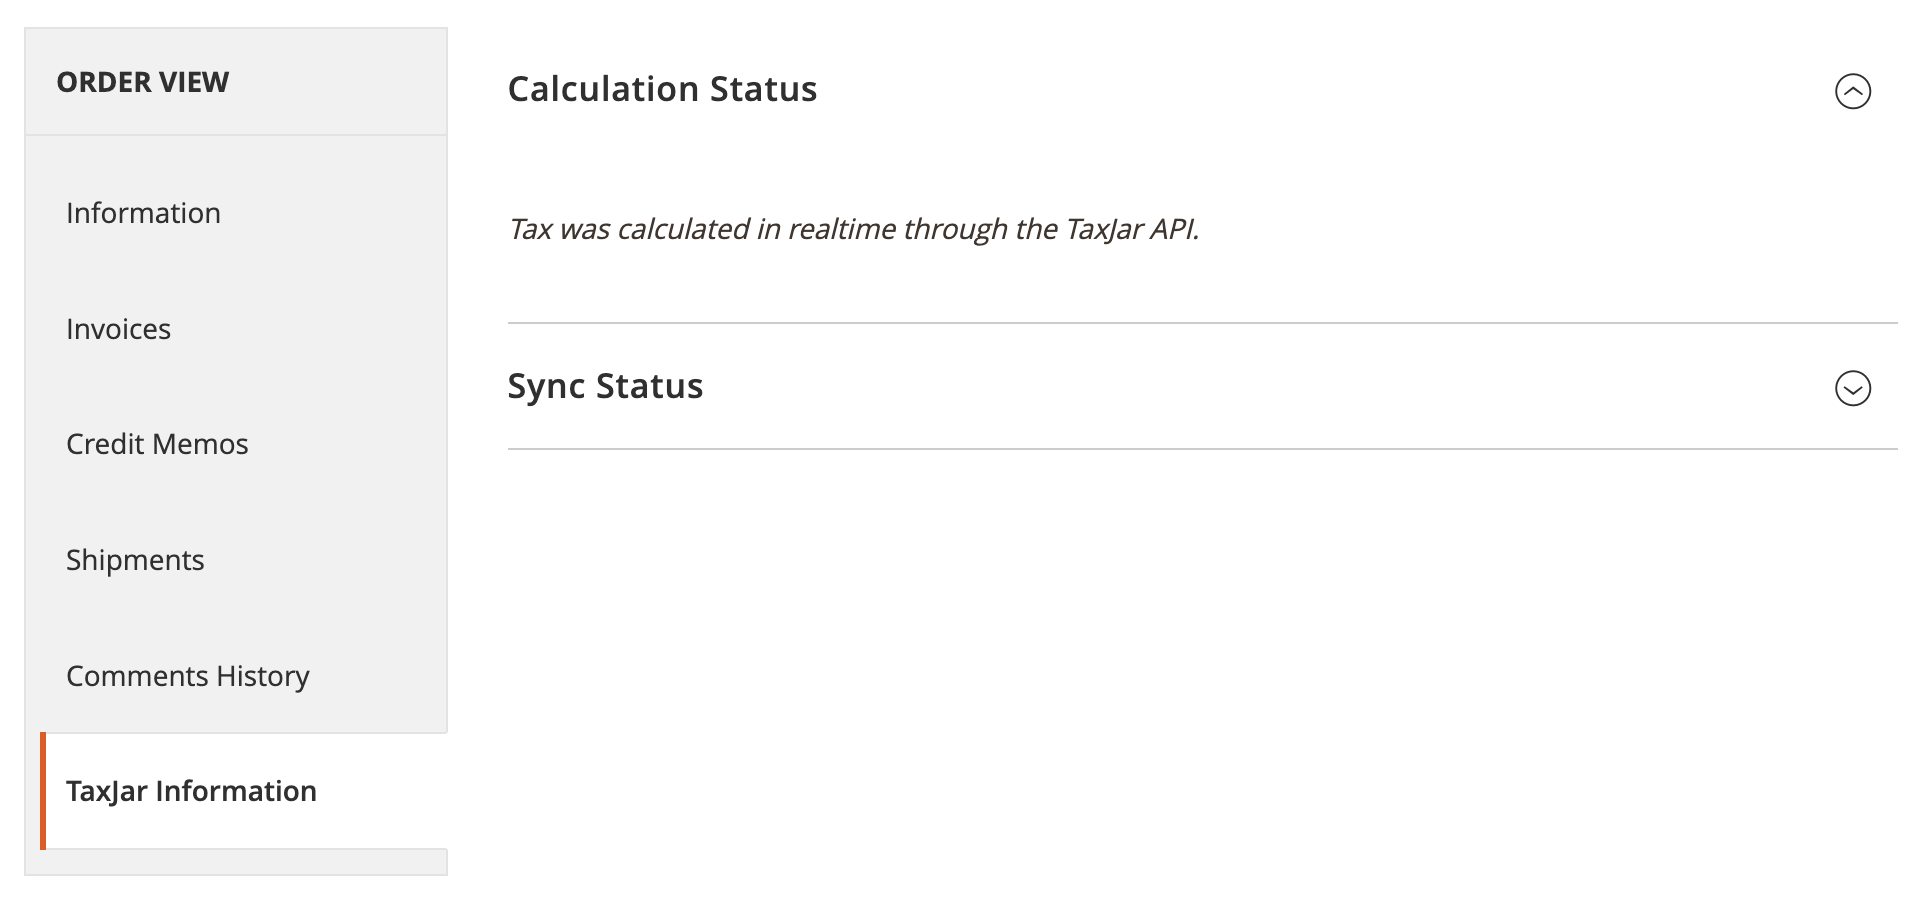
Troubleshooting Tax Calculations
If you expected a transaction to have tax calculated but it did not, you can check the calculation status of an order within the “TaxJar Information” tab located in the admin Sales Order view. Upon opening the Calculation Status sub-tab from the order’s TaxJar Information view, the resulting text should detail why TaxJar was unable to calculate tax for this order or that tax was successfully calculated.
Support
If you have additional questions or need help integrating your Magento 2 and TaxJar accounts, please contact our support team.