

Handling Sales Tax with Stripe
If you’ve done any research into handling sales tax with Stripe, you’ve probably discovered it’s going to be your next super fun DIY project. Congratulations! Stripe makes payments easier for developers, but they leave the sales tax to you. And for good reason — rates can vary by jurisdiction across the entire United States based on many factors. That’s why I’m writing this guide. First we’re going to learn how to add sales tax for charges and subscriptions using Stripe’s API. Next, we’ll jump into an implementation using the TaxJar API for calculating sales tax.
We’ll cover payments for products and subscriptions in the United States, Canada, and European Union. If you’re using Stripe with an existing eCommerce platform such as Magento, WooCommerce, or Shopify, there’s plenty of plugins and extensions out there that don’t require any additional work. This guide is strictly for developers looking to calculate sales tax in their own custom applications and services.
Update June 2016: TaxJar is now fully integrated with Stripe’s product and order APIs. Check out the Stripe documentation to learn more!
Adding Sales Tax to Charges in Stripe
Currently there isn’t a parameter to specify sales tax for a charge or one-time payment in Stripe. You’ll need to add sales tax to the amount attribute (order total + tax) and record the amount of sales tax yourself. If you’re storing transactions in a database it’s a good idea to store the tax in a separate column for future reference. In addition, you can take advantage of the metadata attribute when adding a new charge to specify the amount of tax:
```ruby require “stripe” Stripe.api_key = “sk_test_78ADlJ2faEbeKg4fhqrj9uKJ”
Stripe::Charge.create( :amount => 420, # 4.00 + 0.20 tax :currency => “usd”, :source => “tok_17ES5TLceZbUT7Qjw4V6fBWD”, # Obtained with Stripe.js :description => “Charge for [email protected]”, :metadata => { :tax => 20, :tax_percent => 5 } ) ```
The metadata attribute is a simple way to store a set of key/value pairs in a structured format. It’s available in most Stripe objects. When reviewing payments in the Stripe dashboard you’ll be able to see this metadata under Payment Details or in the JSON objects for logging and events.
If you’re based in Canada or the EU, you could store the full tax breakdown in the metadata attribute:
ruby
:metadata => {
  :standard_rate => 25,
  :reduced_rate => 6,
  :super_reduced_rate => 12,
  :freight_taxable => true
}
Adding Sales Tax to Subscriptions in Stripe
As of Dec. 2014, Stripe now includes the attribute tax_percent in the subscription object. According to their documentation, this is a positive decimal (with at most two decimal places) between 1 and 100:
This represents the percentage of the subscription invoice subtotal that will be calculated and added as tax to the final amount each billing period. For example, a plan which charges $10/month with a tax_percent of 20.0 will charge $12 per invoice. - Stripe API Reference
Sales tax will be applied to recurring subscription invoices. Previously you had to use Stripe’s webhooks to create a separate charge for tax after each invoice so this eliminates a lot of extra work.
```ruby require “stripe” Stripe.api_key = “sk_test_78ADlJ2faEbeKg4fhqrj9uKJ”
customer = Stripe::Customer.retrieve(“cus_7TRBTsRX3mPt3O”) customer.subscriptions.create( :plan => “gold”, :tax_percent => 12 ) ```
When viewing a customer in the Stripe dashboard you’ll be able to see tax_percent under Subscriptions as “Tax Percent”:
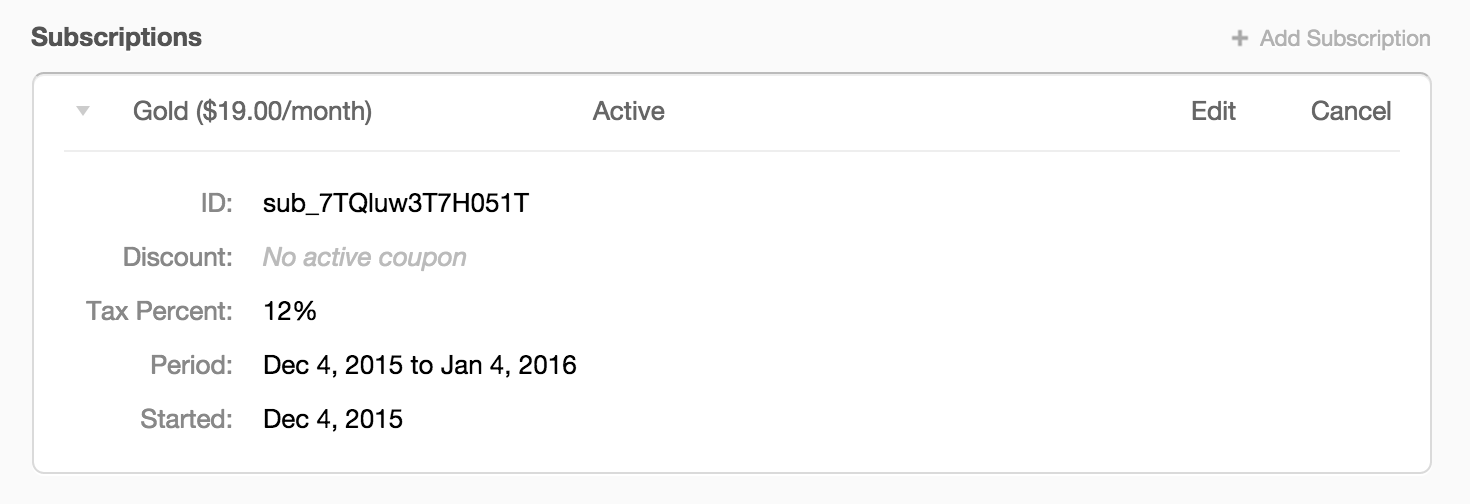
Similar to charges, you can use the metadata attribute to break down the sales tax for your own reference later. Most sales tax APIs will show you tax rates and amounts by jurisdiction.
Calculating Sales Tax with Stripe
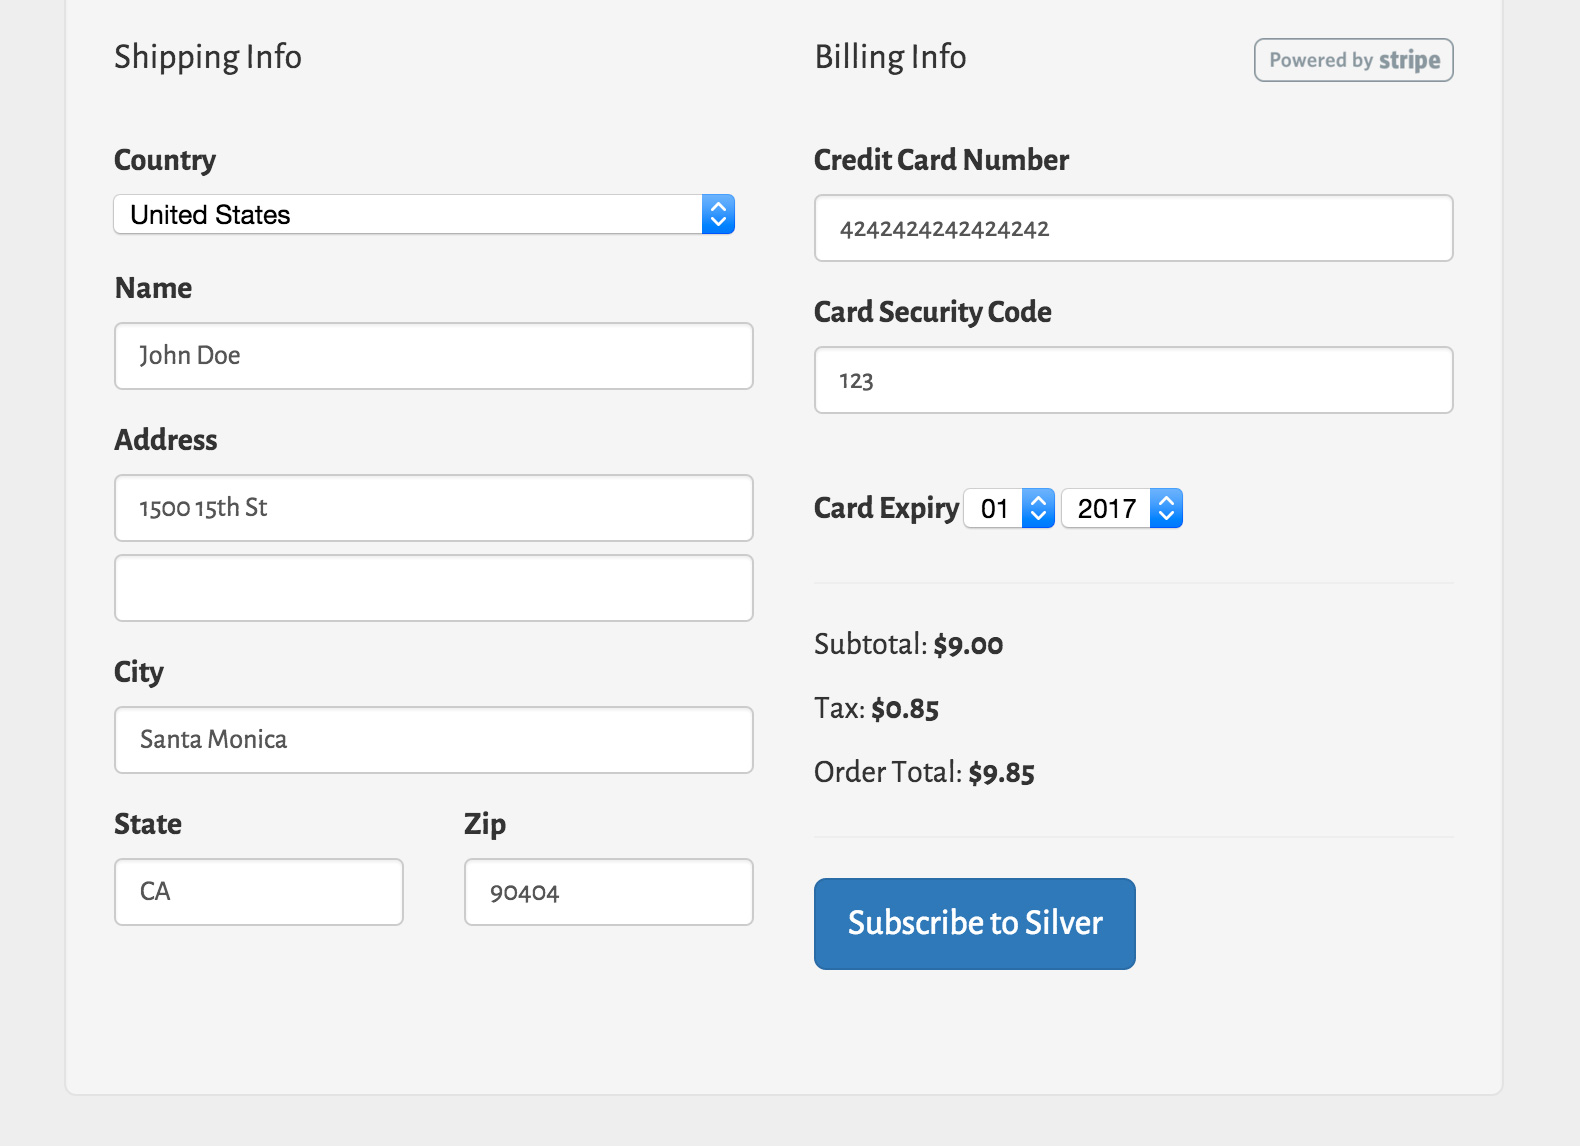
Stripe provides a couple ways of handling payments in your application or website. You can either use an embedded form via Stripe Checkout or a custom form with Stripe.js to collect and tokenize a customer’s credit card. Checkout is beautifully designed and mobile-friendly, but it’s fairly high-level and difficult to customize. Although it now supports billing/shipping addresses, you’ll have more control over displaying order tax and totals with a custom form.
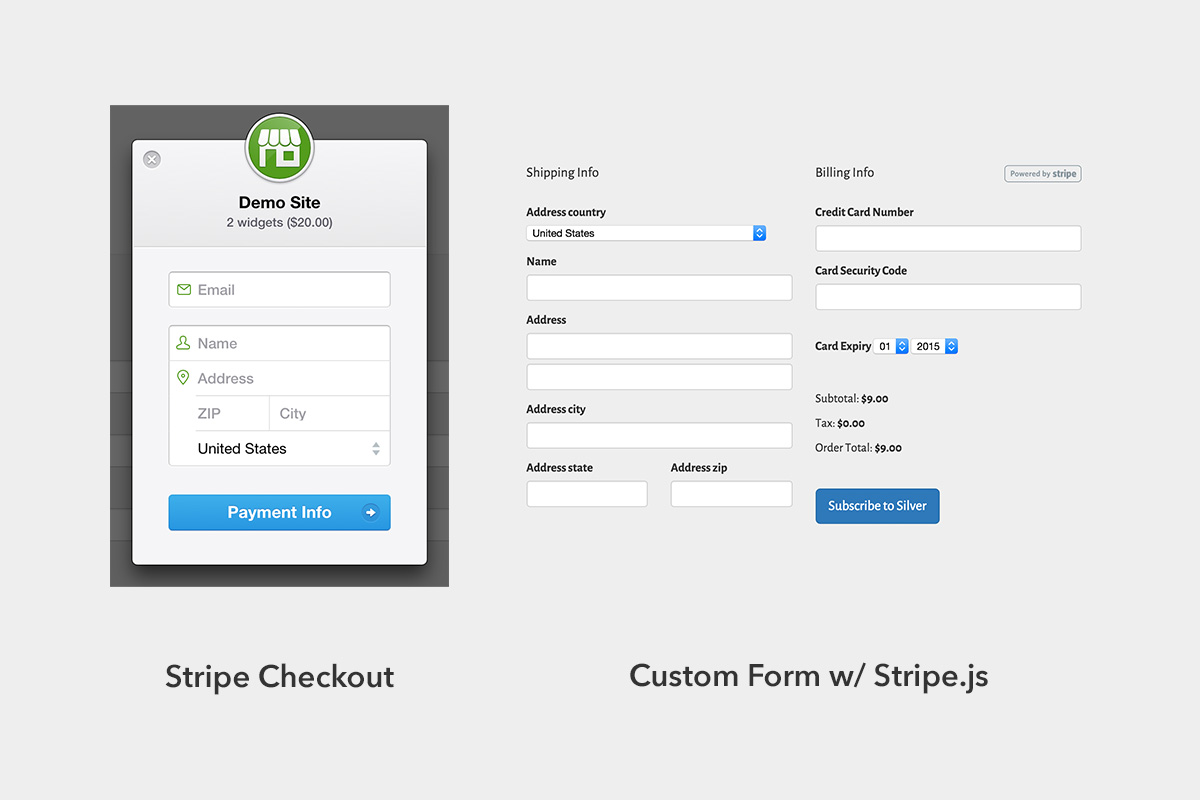
Sales tax calculation can be done on the client-side via AJAX or entirely on the server-side. It’s your call. For a great user experience, you’ll probably want to show the amount of sales tax immediately after an address is provided and prior to completing the purchase. After generating a single-use token with the customer’s credit card, you can send the token and custom form parameters to your server to complete the charge or subscription using Stripe’s API.
If you intend to use our sales tax API to calculate sales tax, you’ll want to be mindful of how many calls you make to save money. You can avoid unnecessary API calls by understanding the concept of sales tax nexus. If the delivery address falls in a different state than those in which a company has nexus, no sales tax needs to be collected. In other words, you should speak with your accountant to determine where you have nexus and if the types of products you sell actually require collecting sales tax. For marketplaces with many individual merchants, you’ll want to track addresses for each merchant and compare them against the customer’s delivery address. Keep in mind this only works for US-based sales. Overseas sales have different rules.
Implementing Stripe Sales Tax Calculation at Checkout
Several sales tax automation companies provide a script alongside Stripe.js to make AJAX requests to a proxy in order to calculate sales tax. Basically this is just a wrapper to make asynchronous requests to your server. You probably don’t need an extra script to handle this and get in the way of your existing toolchain. Just make an AJAX request using vanilla JS or the library of your choice to your server.
The request should hit an endpoint on your server with the necessary data params to calculate sales tax and return a JSON response. TaxJar offers the following REST API clients to get up and going quickly:
- taxjar-ruby via RubyGems as
taxjar-ruby - taxjar-python via PyPI as
taxjar - taxjar-php via Composer as
taxjar/taxjar-php - taxjar-node via NPM as
taxjar - taxjar.net via NuGet as
TaxJar - taxjar-java via Maven & Gradle as
com.taxjar:taxjar-java - taxjar-go as
taxjarfromgithub.com/taxjar/taxjar-go
If there’s a language you’d like us to support, leave a comment. There’s also many generic REST clients that make it easy to connect to the TaxJar API or any REST API:
- Ruby: https://github.com/rest-client/rest-client
- Node: https://github.com/danwrong/restler
- Python: https://github.com/datafolklabs/drest
- PHP: https://github.com/guzzle/guzzle
- Go: https://github.com/bndr/gopencils
- C#: https://github.com/restsharp/RestSharp
For more information about our sales tax API, view the documentation here.
To get your API token, sign up for a free 30 day trial.
Stripe Sales Tax on Rails
If you’re starting from scratch or just want a feel for how everything works, I created an example app that can be one-click deployed to Heroku. It’s built on top of rails-stripe-membership-saas and uses Payola, a drop-in Rails engine for accepting payments with Stripe.

You’ll need to provide the following environment keys for Heroku:
- Stripe API Key
- Stripe Publishable Key
- TaxJar API Token

This is an end-to-end solution using Rails and taxjar-ruby to demonstrate the following checkout flow:
- Customer provides shipping info at checkout for a hypothetical wine subscription service.
- Checkout makes an AJAX request to the server to calculate sales tax.
- Sales tax is presented to the user and added to the custom form in a hidden field.
- Customer submits the order and Stripe generates a single-use token based on the credit card.
- Our Rails app creates a new subscription using Stripe’s API client based on the submitted form fields (including the tax).
Check out the example app and learn how to calculate and apply sales tax for recurring subscriptions in Stripe.
Wrapping Up
This article gave you a basic introduction to handling sales tax with Stripe and ways you can get started with the TaxJar API. If you have any questions about sales tax we’re here to help! Leave a comment or contact us at support@taxjar.com.